Author: OveNami

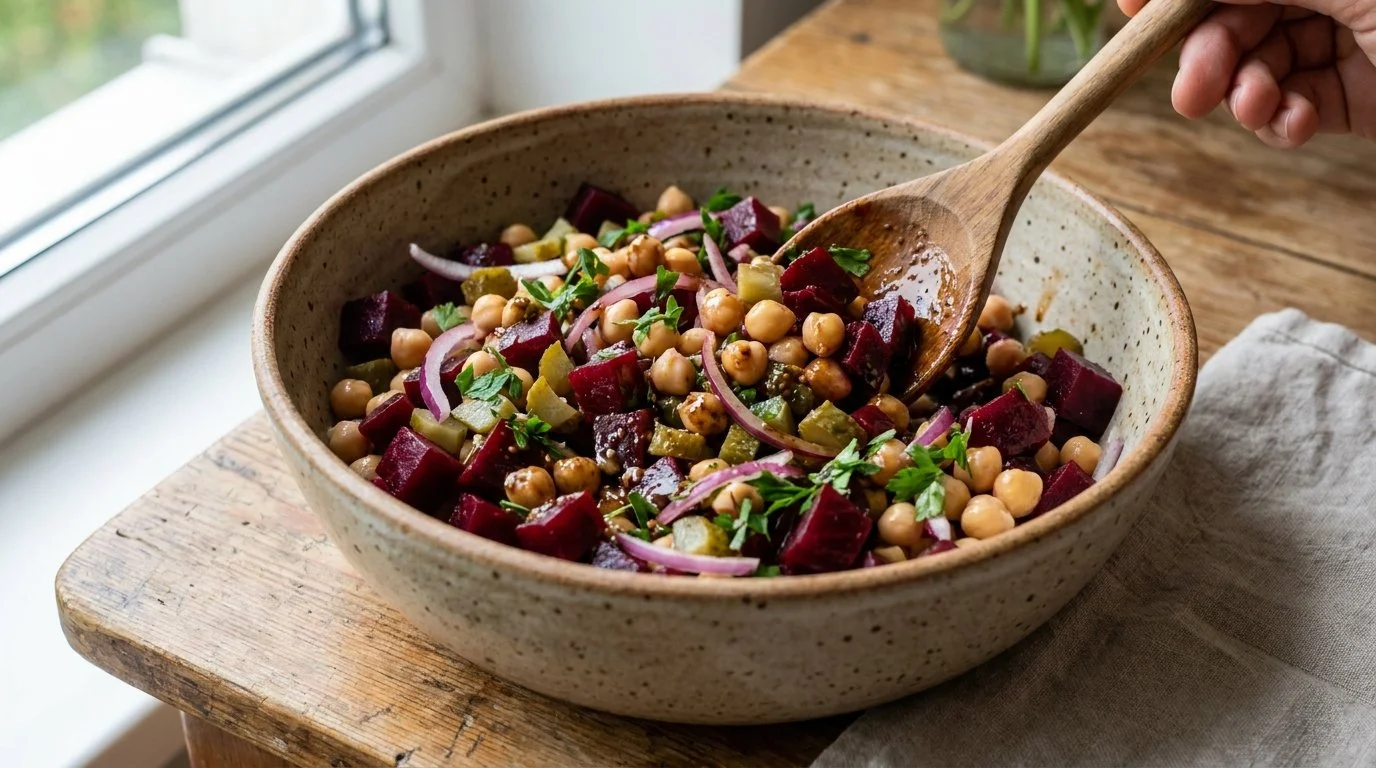
  • Forget about belly fat! Mediterranean beetroot salad for youth and beauty!

    Forget about belly fat! Mediterranean beetroot salad for youth and beauty!

    This Mediterranean beetroot salad is a refreshing, vibrant dish that combines earthy beetroot, tangy pickles, and protein-rich chickpeas for a balanced and satisfying meal. It’s a great choice for anyone looking for a simple, nutrient-packed salad that’s perfect for lunch or a light dinner. The olive oil and balsamic vinaigrette dressing adds just the right amount of richness without overwhelming the fresh flavors. This salad may appeal especially to home cooks who appreciate practical recipes that come together quickly and offer versatility for everyday eating. Given its wholesome ingredients, it may be useful for those seeking a filling, plant-based option that supports general well-being without relying on complex preparations. 

    Why This Recipe Is Helpful

    • Uses simple, everyday ingredients that come together quickly for an easy, no-fuss meal.
    • Combines plant-based protein and fiber for a filling dish suitable for balanced eating.
    • The salad can be made in advance, which helps with convenient meal planning.

    Best For

    This salad suits anyone who enjoys light yet nourishing meals with a Mediterranean flair. It’s ideal for those seeking easy vegetarian options packed with natural flavors.

    Be Careful If

    If you need to watch sodium intake, be mindful of the pickle and added salt in the dressing. The honey and balsamic vinegar contribute natural sugars, so consume in moderation if managing sugar intake.

    Ingredients

    Salad

    • 1 boiled beetroot, peeled and diced
    • 60 grams (2 oz) pickle, finely chopped
    • 200 grams (7 oz) cooked chickpeas (canned, drained, or homemade)
    • 1 red onion, finely chopped
    • 5 grams (1 tbsp) fresh parsley, chopped

    Dressing

    • 50 grams (3 ½ tbsp) olive oil
    • 2 tbsp (30 ml) balsamic vinegar
    • 1 tsp Dijon mustard
    • 1 tbsp (15 g) honey
    • 1 tsp Herbs of Provence
    • 2 cloves garlic, minced
    • Salt, to taste
    • Pepper mix, to taste

    Ingredient Notes

    • Beetroot: Pre-boiled beetroot speeds up preparation—freshly cooked or store-bought works fine.
    • Pickle: Adds acidity and crunch; use your favorite type such as dill or sweet pickle depending on preference.
    • Chickpeas: A great plant protein and fiber source; canned chickpeas are convenient and ready to use.
    • Dressing: The blend of olive oil with honey and mustard balances tanginess and sweetness with herbal notes.

    Kitchen Tools Needed

    • Medium bowl for mixing salad
    • Small bowl or jar for dressing
    • Sharp knife and chopping board
    • Whisk or fork for dressing
    • Refrigerator for marinating

    Step-by-Step Instructions

    1. Dice the boiled beetroot into small, even cubes for uniform texture.
    2. Finely chop the red onion and parsley to distribute flavor evenly throughout the salad.
    3. In a medium bowl, combine the beetroot, chopped pickle, cooked chickpeas, red onion, and parsley.
    4. In a small bowl or jar, whisk together olive oil, balsamic vinegar, mustard, honey, minced garlic, Herbs of Provence, salt, and pepper until well emulsified.
    5. Pour the dressing over the salad mix and toss gently to coat all ingredients without bruising the beetroot.
    6. Cover the bowl and refrigerate for at least 30 minutes, allowing flavors to meld for a tastier salad.
    7. Serve chilled for best taste and freshness.

    Pro Tips

    • Use a whisk or shake the dressing in a lidded jar for quick emulsification.
    • Letting the salad rest helps soften the onions and pickle slightly, mellowing sharpness.
    • Adjust salt carefully especially if your pickles are already salty to avoid over seasoning.

    Lighter Swaps

    • Use a lighter oil such as avocado if preferred, but olive oil offers the best flavor balance.
    • Substitute honey with maple syrup for a vegan alternative if desired.
    • Skip the honey for a less sweet dressing—The mustard and balsamic will keep tanginess.

    Common Mistakes

    • Overdicing beetroot can make the salad mushy; medium-sized cubes hold shape better.
    • Adding dressing too early can make the salad soggy if left too long before serving.
    • Neglecting to taste and adjust seasoning after mixing can result in a bland salad.

    Serving Suggestions

    Serve this salad as a side dish alongside grilled fish or chicken, or enjoy it as a light main with warm crusty bread.

    Storage Instructions

    Store the salad in an airtight container in the refrigerator for up to 2 days. The flavors will develop, but the salad is best eaten fresh.

    Reheating Tips

    This salad is best served chilled and does not require reheating.

    Nutrition Estimate (per serving)

    Calories: 280 kcal
    Protein: 9 g
    Carbohydrates: 32 g
    Fat: 13 g

    Values are estimates and may vary depending on exact portions and products used.

    Recipe Summary

    Prep Time: 15 minutes
    Cook Time: 0 minutes (assuming beetroot pre-cooked)
    Total Time: 45 minutes (including marinating)
    Servings: 2–3
    Cuisine: Mediterranean
    Course: Salad
    Calories: Approx. 280 kcal per serving

    Frequently Asked Questions

    Q: Can I use raw beetroot for this salad?
    A: It’s best to use boiled beetroot for softer texture and easier digestion, but you can roast it beforehand if preferred.

    Q: Is this salad suitable for vegans?
    A: Yes, swap honey with a plant-based sweetener like maple syrup to keep it vegan-friendly.

    Q: How long can I store the salad?
    A: Keep refrigerated in an airtight container up to 2 days for best freshness.

    This beetroot salad is a simple way to brighten your meal routine while enjoying balanced flavors and textures. Its easy assembly and wholesome ingredients make it a recipe worth returning to often. With minimal effort, you can enjoy a pretty, flavorful dish that supports everyday wholesome eating. 
  • Grandma’s famous 8-spoon plum cake in 5 minutes! No scales needed!

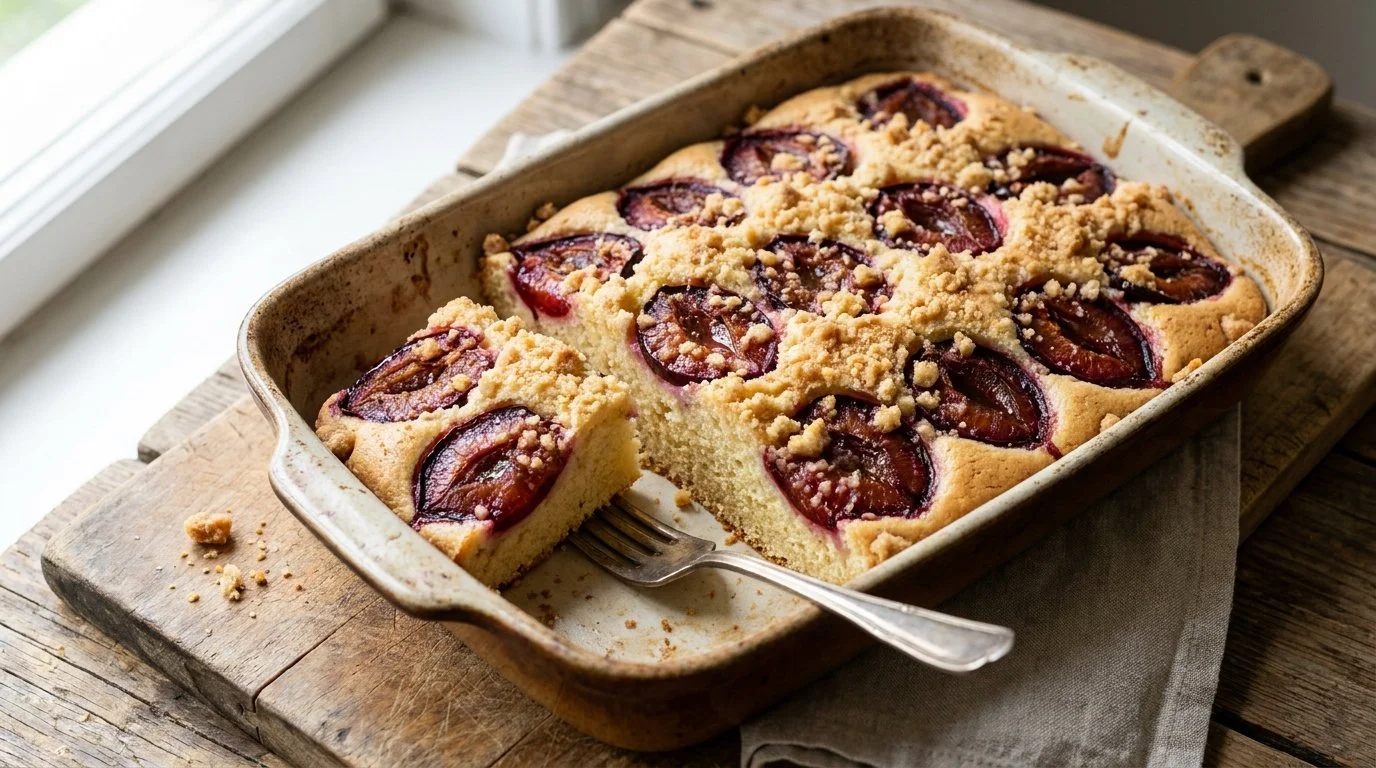
    Grandma’s famous 8-spoon plum cake in 5 minutes! No scales needed!

    This simple plum cake recipe brings a nostalgic touch to your kitchen with a fuss-free method that requires no scales—just an easy spoon-measure approach. Using fresh plums enveloped in a tender lemony batter topped with a buttery crumble, this cake is ideal for those who want a straightforward dessert with a homemade feel. It’s perfect for anyone who appreciates fruity cakes that aren’t overly sweet and want a quick way to create a delicious treat. Since it’s made with basic pantry ingredients and fresh fruit, it makes for a pleasant, balanced occasional sweet that can be enjoyed with family or guests. 

    Why This Recipe Is Helpful

    • Measures ingredients easily using tablespoons, making it accessible for any home cook without a scale.
    • Combines fresh fruit with a moist, lemon-infused batter that is quick to prepare yet satisfying.
    • The crumble topping adds texture and a touch of buttery sweetness, enhancing the overall flavor.

    Best For

    This cake is great for home bakers of any skill level looking for a spring or summer dessert. It’s also a wonderful option for casual gatherings or afternoon tea when fresh seasonal plums are available.

    Be Careful If

    This recipe contains a moderate amount of sugar and oil, so it’s best enjoyed in moderation, especially for those monitoring sugar intake.

    Ingredients

    • 2 large eggs
    • 8 tablespoons (100 g) granulated sugar
    • 1 teaspoon vanilla sugar or 1 teaspoon vanilla extract
    • A pinch of salt
    • 8 tablespoons (120 ml) vegetable oil
    • 8 tablespoons (120 ml) milk
    • Zest of 1 lemon
    • 8 tablespoons (120 ml) lemon juice (freshly squeezed)
    • 8 tablespoons (60 g) all-purpose flour
    • 1 teaspoon baking powder
    • 400 grams (about 14 oz) fresh plums
    • 1 tablespoon cornflour (cornstarch)

    For the Crumble Topping:

    • 3 tablespoons (22 g) all-purpose flour
    • 2 tablespoons (25 g) granulated sugar
    • 1 tablespoon (15 g) cold unsalted butter

    Ingredient Notes

    • Using fresh, ripe plums gives the cake the perfect balance of tartness and sweetness; choose firm but juicy fruit.
    • Cornflour helps prevent the plums from sinking and keeps the batter from becoming soggy.
    • Lemon zest and juice brighten the flavor profile, balancing the sweetness and adding natural freshness.
    • Vanilla sugar can be substituted with vanilla extract if preferred; just use one teaspoon.

    Kitchen Tools Needed

    • Mixing bowl
    • Electric whisk or hand whisk
    • Measuring spoons (tablespoon and teaspoon)
    • 18 x 26 cm (7 x 10 inch) baking pan
    • Knife and chopping board
    • Spoon or spatula
    • Oven

    Step-by-Step Instructions

    1. Preheat your oven to 180°C (350°F). Lightly grease your baking pan with butter or oil.
    2. In a mixing bowl, whisk the eggs and sugar together briskly until frothy and lighter in color. This ensures a light texture.
    3. Add the vanilla sugar (or extract), a pinch of salt, vegetable oil, milk, lemon zest, and lemon juice. Stir until everything is well combined.
    4. Gradually sift in the flour and baking powder, folding carefully until you get a smooth, lump-free batter.
    5. Pit half of the plums and dice them into small pieces. Toss these diced plums in the cornflour, then fold them gently into the batter to distribute evenly.
    6. In a separate small bowl, prepare the crumble topping by rubbing together the flour, sugar, and cold butter until the mixture resembles coarse breadcrumbs.
    7. Pour the batter into your greased baking pan and smooth the surface gently with a spatula.
    8. Slice the remaining plums and arrange the slices evenly on top of the batter.
    9. Sprinkle the crumble topping evenly over the fruit layer.
    10. Bake in the preheated oven for about 40 minutes, or until the top is golden brown and a toothpick inserted into the center comes out clean. If the crumble browns too quickly, cover loosely with foil after 30 minutes.
    11. Allow the cake to cool completely in the pan before slicing, so it sets nicely and slices cleanly. Serve warm or at room temperature.

    Pro Tips

    • Make sure the plums are coated well in cornflour to keep the batter from becoming watery.
    • Use fresh lemon juice for the best bright citrus flavor — bottled lemon juice won’t deliver the same freshness.
    • Don’t overmix the batter once flour is added to keep the cake tender and light.
    • If you don’t have vanilla sugar, a good quality vanilla extract works perfectly.

    Lighter Swaps

    • Substitute the vegetable oil with a light olive oil or melted coconut oil for a different flavor profile.
    • Use almond milk or oat milk instead of dairy milk for a dairy-free option.
    • For less sugar in the crumble topping, reduce sugar to 1 tablespoon; the plums add natural sweetness.

    Common Mistakes

    • Not properly coating the diced plums with cornflour; this can cause the batter to turn soggy.
    • Overbaking, which results in a dry cake—check starting at 35 minutes.
    • Using very soft or overripe plums can lead to excess moisture and affect cake texture.

    Serving Suggestions

    Serve slices with a dollop of whipped cream, yogurt, or vanilla ice cream for a more indulgent dessert option.

    Storage Instructions

    Store the cake in an airtight container at room temperature for up to 2 days, or refrigerate for up to 5 days.

    Reheating Tips

    Warm slices gently in a microwave for 15–20 seconds or in a low oven before serving to refresh the texture.

    Nutrition Estimate (per serving, based on 8 servings)

    • Calories: 290–320 kcal
    • Protein: 4 g
    • Carbohydrates: 40 g
    • Fat: 12 g

    Values are estimates and may vary by ingredients and portion size.

    Recipe Summary

    Prep Time: 10 minutes
    Cook Time: 40 minutes
    Total Time: 50 minutes
    Servings: 8
    Cuisine: European homestyle
    Course: Dessert
    Calories: Approximately 300 kcal per serving

    Frequently Asked Questions

    Q: Can I use frozen plums for this recipe?
    A: You can, but thaw and drain them well before adding, and toss in extra cornflour to prevent excess moisture.

    Q: Is this cake suitable for gluten-free diets?
    A: Not as is, but you can substitute the flour with a gluten-free blend and check the baking powder for gluten content.

    Q: Can I make the crumble topping ahead of time?
    A: Yes, you can prepare the crumble topping a day in advance and keep it chilled until ready to use.

    This plum cake is a delightful mix of simplicity and flavor that makes it a valuable recipe to have on hand. Its easy method means you can get a fresh homemade cake on the table with minimal fuss, perfect for those moments when a quick, comforting dessert is needed.

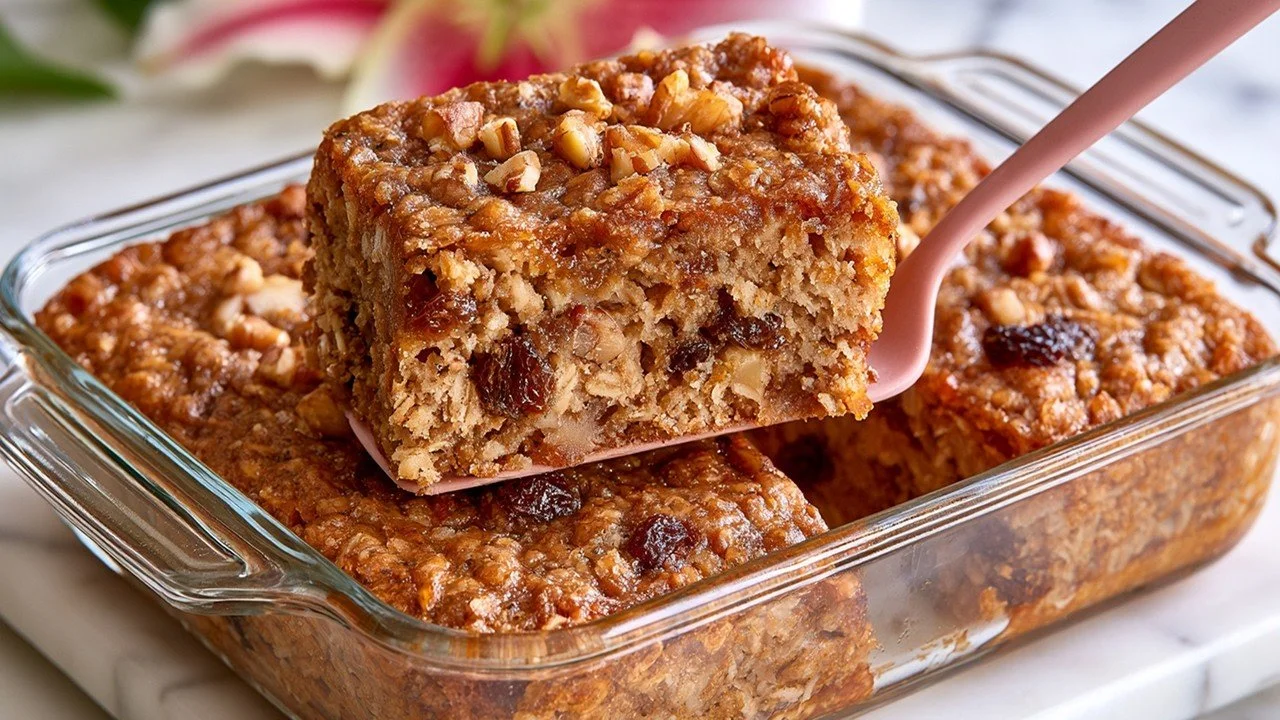
  • Oatmeal, yogurt, and apple! A healthy cake without flour and sugar!

    Oatmeal, yogurt, and apple! A healthy cake without flour and sugar!

    This oatmeal, yogurt, and apple cake is a simple and wholesome treat that doesn’t rely on flour or refined sugar. It’s naturally sweetened with honey and fruit, making it an appealing option for anyone looking for a healthier dessert or snack that still feels indulgent. With the goodness of whole oats, fresh apples, nuts, and berries, this cake is filling and balanced, suitable for busy home cooks who want quick, nourishing homemade baking. Since it includes nuts and dairy, it’s important to keep those dietary factors in mind when serving.

    Why This Recipe Is Helpful

    • Uses simple, natural ingredients for a whole-food approach to baking.
    • Flourless and refined sugar-free, making it suitable for light and quick baking.
    • Combines fruit and nuts for extra fiber and healthy fats to keep you full longer.

    Best For

    People who want a convenient, lightly sweetened cake without processed flour or sugar. A good choice for a family snack or breakfast treat.

    Be Careful If

    You need to avoid nuts or dairy, as this recipe contains both nuts and yogurt. It also has natural fruit sugars, so moderation is key.

    Ingredients

    • 1 cup (90 g) oatmeal
    • 2 tablespoons (30 g) yogurt (plain or Greek)
    • 1 large egg
    • 1 medium apple, chopped (about 150 g)
    • 1/3 cup (40 g) mixed nuts, roughly chopped
    • 1 tablespoon (12 g) baking powder
    • 1/4 cup (40 g) blueberries or raisins
    • 1 tablespoon (21 g) honey

    Ingredient Notes

    • Oatmeal: Using rolled oats works best for texture; instant oats may make it too mushy.
    • Yogurt: Adds moisture and slight tanginess; plain or Greek options both work.
    • Apple: Provides natural sweetness and moisture—no need for added sugar.
    • Nuts: Enhance texture and nutrition; walnuts or almonds are great choices.

    Kitchen Tools Needed

    • Mixing bowl
    • Spoon or spatula
    • 8-inch (20 cm) square or round baking pan
    • Oven
    • Measuring cups and spoons

    Step-by-Step Instructions

    1. Preheat your oven to 180°C (350°F). Lightly grease your baking pan to prevent sticking.
    2. In a large mixing bowl, combine the oatmeal, baking powder, chopped nuts, and blueberries or raisins. Stir well to distribute everything evenly.
    3. Add the yogurt, egg, chopped apple, and honey into the dry ingredients. Mix thoroughly until you have a uniform batter. The mixture will be thick but moist.
    4. Pour the batter into the prepared baking pan, smoothing the top with a spatula.
    5. Bake for about 40 minutes, or until the cake is golden brown and a toothpick inserted in the center comes out clean.
    6. Remove from the oven and allow the cake to cool completely in the pan before slicing.
    7. Serve plain or with extra yogurt or fresh fruit on the side for added taste and texture.

    Pro Tips

    • Chop nuts finely if serving to children or to make the cake easier to slice.
    • Letting the batter sit for 5 minutes before baking helps the oats absorb moisture for a softer bite.
    • Check the cake around 35 minutes to avoid overbaking, which can dry it out.
    • Use fresh or frozen blueberries; just thaw if frozen before mixing in.

    Lighter Swaps

    The original version works best for moisture and flavor balance, but you can reduce honey slightly if you prefer less sweetness.

    Common Mistakes

    • Overmixing the batter can create a dense cake; mix until just combined.
    • Not greasing the pan can cause sticking — be sure to prepare your pan well.
    • Using very wet or pureed fruits instead of chopped apple may change the texture too much.

    Serving Suggestions

    Enjoy this cake as a light breakfast, a nutritious snack, or alongside a cup of tea or coffee.

    Storage Instructions

    Store leftovers in an airtight container at room temperature for up to 2 days, or in the fridge for up to 5 days.

    Reheating Tips

    Warm slices gently in a microwave or oven for a cozy, fresh-from-the-oven feel.

    Nutrition Estimate (per serving, recipe makes about 6 servings)

    Calories: Approximately 150-180
    Protein: Around 5 g
    Carbs: About 25 g
    Fat: Roughly 6 g
    Values are estimates and may vary by ingredients and portion size.

    Recipe Summary

    Prep Time: 10 minutes
    Cook Time: 40 minutes
    Total Time: 50 minutes
    Servings: 6
    Cuisine: Healthy/Bakery
    Course: Snack or Breakfast
    Calories: Approximately 150-180 per serving

    Frequently Asked Questions

    Q: Can I use gluten-free oats in this recipe?
    A: Yes, gluten-free oats work perfectly, making this recipe suitable for gluten-sensitive individuals.

    Q: Is it possible to make this recipe vegan?
    A: You can substitute the egg with a flax egg and use dairy-free yogurt and honey alternatives, but texture may differ slightly.

    Q: Can I freeze this cake?
    A: Yes, it freezes well. Wrap slices tightly after cooling and thaw at room temperature before serving.

    This cake is a wonderful balance of convenience, health, and taste, making it an excellent choice when you want a home-baked treat that’s both satisfying and nourishing.

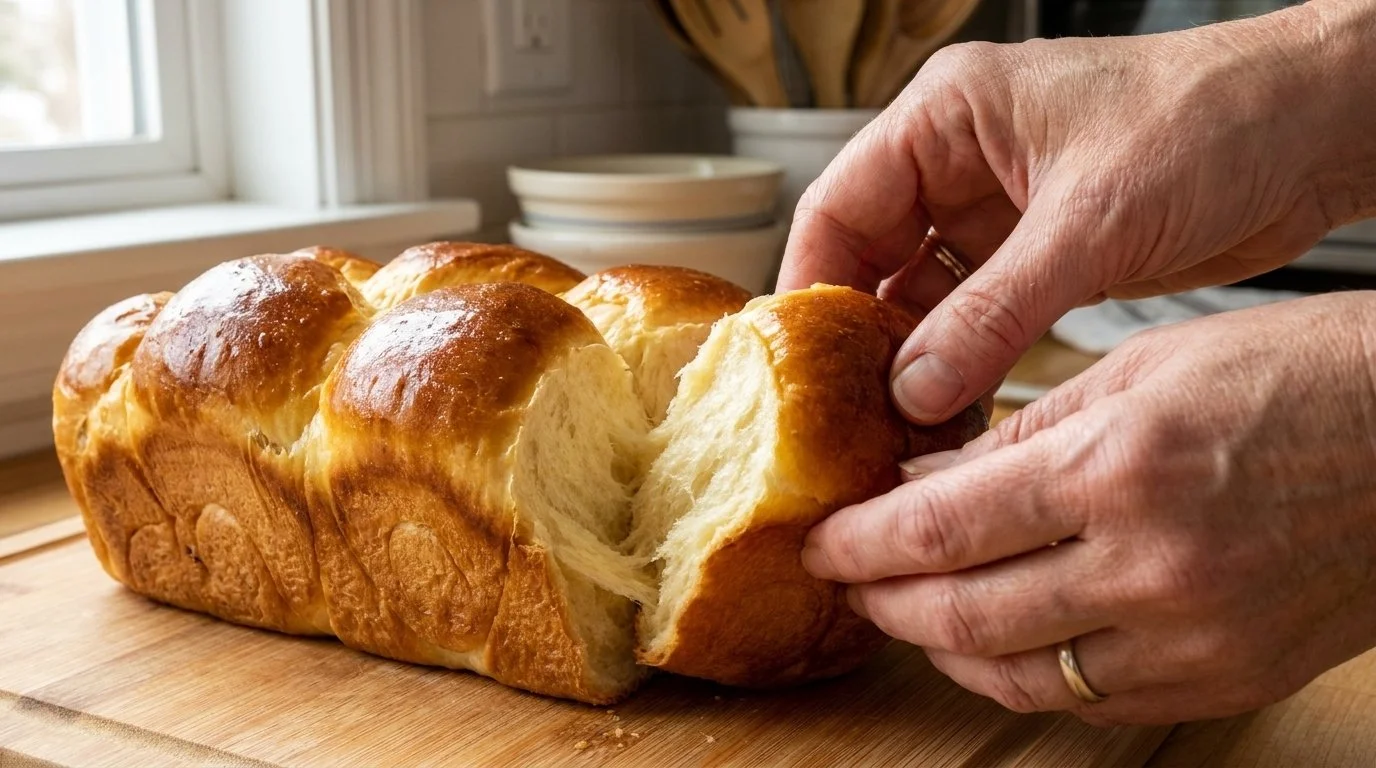
  • FRENCH BRIOCHE BREAD/ ultra soft, rich, buttery with perfect golden-crusted

    FRENCH BRIOCHE BREAD/ ultra soft, rich, buttery with perfect golden-crusted

    French brioche bread is a delightfully soft, rich, and buttery treat with a beautiful golden crust that complements any breakfast or afternoon tea. This recipe gives you that perfectly tender crumb and shiny finish, making it ideal for home bakers who appreciate a traditional yet straightforward French classic. The dough requires some patience with rising and kneading, but the results are well worth it. While brioche is high in butter and eggs, making it an indulgence best enjoyed in moderation, it shines as a special occasion bread to enjoy with your morning coffee or a light jam.

    Why This Recipe Is Helpful

    • Uses a straightforward yeast mixture to ensure a reliable rise and flavor.
    • Incorporates softened butter gradually for that signature silky dough texture.
    • Comes with clear guidance on proofing times to avoid common dough problems.

    Best For

    This brioche is perfect for those who want an authentic, buttery bread that elevates simple meals. It’s great for weekend baking, special breakfasts, or anyone who enjoys baking enriched bread recipes.

    Be Careful If

    Brioche is rich in butter and eggs, so it’s best enjoyed in moderation, especially for those monitoring fat or calorie intake.

    Ingredients

    • 375 g (about 3 cups) bread flour, divided (50 g for yeast mix, 325 g for dough)
    • 75 g (6 tablespoons) sugar, divided (25 g for yeast mix, 50 g for dough)
    • 5 g (1 ½ teaspoons) instant dry yeast
    • 100 ml (about 7 tablespoons) milk
    • ½ teaspoon salt
    • 3 medium eggs, plus 1 extra egg for egg wash
    • 120 g (½ cup or 1 stick) unsalted butter, softened

    Ingredient Notes

    • Bread flour is preferred for its protein content, which helps develop gluten for a sturdy yet soft crumb.
    • Softened butter is key; cold butter won’t incorporate properly.
    • Instant yeast is used for convenience, but active dry yeast can be substituted by proofing it in warm milk first.
    • Whole eggs give the dough richness and color, while the egg wash creates the shiny golden crust.

    Kitchen Tools Needed

    • Stand mixer with a dough hook (optional but recommended)
    • Mixing bowls
    • Measuring cups and spoons
    • Pastry brush for egg wash
    • Oven and baking tray
    • Plastic wrap or clean towel for covering dough

    Step-by-Step Instructions

    1. Prepare the yeast mixture: Combine 100 ml milk, 25 g sugar, 5 g instant yeast, and 4 tablespoons of the bread flour (from the 50 g reserved) in a bowl. Mix well and let it sit for 30 minutes at room temperature until bubbly and active. For a slower ferment, refrigerate overnight.

    2. Mix dry ingredients: In the stand mixer bowl, combine the remaining 325 g bread flour, 50 g sugar, and ½ teaspoon salt.

    3. Prep eggs: Lightly whisk 3 eggs in a separate bowl.

    4. Start kneading dough: Add the bubbly yeast mixture to the dry ingredients. With the mixer running on low speed, gradually pour in the whisked eggs. Knead for about 7-8 minutes until the dough starts forming but is still a bit sticky.

    5. Add butter: Add the softened butter in small pieces gradually while the mixer runs continuously. Knead for 10-15 more minutes. The dough should become smooth, elastic, and less sticky but still soft. If dough feels too warm or oily, pause to let it cool or add a small ice cube during kneading.

    6. First rise: Transfer dough to a greased bowl, cover well with plastic wrap or a towel, and let it rise for about 1 hour or until doubled in size.

    7. Shape the dough: Punch down the risen dough gently. Divide it into six equal portions, shaping each into smooth balls.

    8. Proof dough balls: Place shaped balls on a baking tray lined with parchment paper. Cover and let them proof in a warm spot for 45 to 60 minutes until puffy.

    9. Preheat oven: Set oven to 170°C (340°F) and prepare an egg wash by whisking the extra egg.

    10. Egg wash and bake: Gently brush the top of each dough ball with the egg wash for that signature shine and golden crust. Bake for 30-35 minutes until the brioche has a rich golden color and sounds hollow when tapped.

    Pro Tips

    • Lightly flour your hands when handling sticky dough to prevent tearing but avoid over-flouring which can dry the bread.
    • Using softened butter ensures it blends smoothly without lumps.
    • Control proofing time carefully; too long can cause a loss of flavor or a coarse crumb.
    • If dough feels too oily during kneading, chilling briefly can help maintain the right texture.

    Lighter Swaps

    Brioche is inherently rich, so lighter substitutions may impact texture and flavor. The original recipe works best especially for maintaining its buttery softness.

    Common Mistakes

    • Adding butter too quickly can cause dough to separate.
    • Over-proofing leads to a flat texture and weaker flavor.
    • Using cold butter makes kneading difficult and results in uneven crumb.

    Serving Suggestions

    Serve fresh brioche warm with butter, honey, or jam for breakfast, or use it for sandwiches and French toast.

    Storage Instructions

    Store brioche in an airtight container or wrapped in foil to keep it soft for up to 3 days at room temperature.

    Reheating Tips

    Warm slices briefly in a toaster or oven to refresh the texture before serving.

    Nutrition Estimate (per serving, based on 6 servings)

    • Calories: ~320 kcal
    • Protein: 7 g
    • Carbs: 35 g
    • Fat: 16 g

    Values are estimates and may vary by ingredients and portion size.

    Recipe Summary

    • Prep Time: 45 minutes (plus rising and proofing)
    • Cook Time: 30-35 minutes
    • Total Time: About 2.5 to 3 hours including proving
    • Servings: 6
    • Cuisine: French
    • Course: Breakfast or snack
    • Calories: Approximately 320 per serving

    Frequently Asked Questions

    Q: Can I make the dough without a stand mixer?
    A: Yes, you can knead by hand but expect to spend 15-20 minutes to develop the right dough texture.

    Q: How do I know when the brioche is baked perfectly?
    A: Look for a deep golden crust and a hollow sound when you tap the bottom of the loaf or buns.

    Q: Can I freeze brioche dough or finished bread?
    A: Brioche dough freezes well before the first rise; finished bread freezes best after fully cooled, then thaw before eating.

    Enjoy making this classic French brioche—its comforting richness and tender crumb make it a rewarding baking project. The buttery aroma and golden crust bring a little French café magic into your kitchen.

  • 2 Eggs and 5 Potatoes! I Stopped Ordering Pizza After Making This

    2 Eggs and 5 Potatoes! I Stopped Ordering Pizza After Making This

    This potato-based pizza recipe is a creative alternative to traditional pizza dough, using simple ingredients like eggs, potatoes, and flour to create a soft, flavorful base. Topped with a colorful chicken and vegetable mix, melted cheese, and a fresh dill-garlic sauce, it offers a satisfying meal with a homemade touch. It’s great for home cooks who want something different but accessible, offering a balance of protein, veggies, and comfort food vibes. 

    Why This Recipe Is Helpful

    • Uses common, affordable ingredients for a unique pizza alternative.
    • Combines vegetables, protein, and dairy for a filling, balanced meal.
    • Offers a gluten-friendly feel with a potato base rather than traditional bread dough.

    Best For

    This recipe suits anyone wanting a homemade, satisfying pizza without traditional yeast dough and those looking to incorporate more vegetables into everyday meals.

    Be Careful If

    The recipe contains dairy and gluten from the flour, so it’s not suitable for those with intolerances or allergies. Also, it includes fried chicken and cheese, so consider portion size if monitoring fat intake.

    Ingredients

    For the Potato Pizza Base:

    • 2 eggs
    • 5 medium potatoes (about 1.5 pounds / 700 g)
    • 1 cup (240 ml) milk
    • 5 tablespoons (40 g) all-purpose flour
    • 10 g (0.35 oz) baking powder
    • Salt, to taste
    • Black pepper, to taste

    For the Topping:

    • 1 red onion, chopped
    • 2 garlic cloves (1 for topping, 1 for sauce), minced
    • 1 chicken breast (about 7 oz / 200 g), diced
    • 1 carrot, grated
    • 100 g (3.5 oz) mushrooms, sliced
    • 1 bell pepper, chopped
    • A bunch of parsley, chopped
    • 1 teaspoon smoked paprika
    • 1 teaspoon oregano
    • Black pepper, to taste
    • Oil for frying

    For the Sauce:

    • 2 tablespoons (30 g) sour cream
    • 1 garlic clove, pressed
    • A bunch of fresh dill, chopped
    • Salt and black pepper, to taste

    Additional:

    • 150–200 g (5.3–7.1 oz) cheese, grated (e.g., mozzarella or cheddar)

    Ingredient Notes

    • Using regular all-purpose flour helps the base hold together, but gluten-free flour substitutions may alter texture.
    • Fresh herbs like dill and parsley brighten the dish and complement the rich toppings.
    • Sour cream in the sauce balances the hearty potato base and cheesy topping with a creamy tang.

    Kitchen Tools Needed

    • Large pot for boiling potatoes
    • Mixing bowls
    • Whisk and fork
    • Baking tray and parchment paper
    • Frying pan
    • Grater for cheese and carrot
    • Knife and cutting board

    Step-by-Step Instructions

    1. Prepare the Potato Base: Peel and slice the potatoes into even pieces. Place in a pot with salted water and boil until soft, about 15-20 minutes. Drain well.
    2. Mash the potatoes thoroughly until smooth. In a large bowl, whisk the eggs, then combine with mashed potatoes.
    3. Add milk, salt, and pepper to the mash, mixing well. Gradually add the flour and baking powder, stirring until you get a smooth, thick batter.
    4. Preheat your oven to 180°C (350°F). Line a baking tray with parchment paper and drizzle with a little oil.
    5. Pour the potato batter onto the tray and spread evenly with a spatula to form a smooth base about ½ inch (1-1.5 cm) thick.
    6. Make the Topping: Heat oil in a frying pan over medium heat. Sauté chopped red onion until translucent, about 3 minutes, add garlic and fry for another minute.
    7. Add diced chicken breast and cook, stirring often, until no longer pink inside, about 5-7 minutes.
    8. Stir in grated carrot, sliced mushrooms, chopped bell pepper, and parsley. Season with smoked paprika, oregano, black pepper, and mix well. Cook for another 5 minutes until vegetables soften.
    9. Spread this cooked topping evenly over the potato base.
    10. Sprinkle the grated cheese over the top, covering the surface completely.
    11. Bake in the oven for 25-30 minutes, or until cheese is melted and golden, and the edges are slightly crisp.
    12. Prepare the Sauce: While baking, mix sour cream with pressed garlic, chopped dill, salt, and black pepper until smooth.
    13. Once baked, remove the pizza from the oven. Let it rest a few minutes before cutting.
    14. Serve warm with the dill and garlic sour cream sauce on the side.

    Pro Tips

    • Make sure potatoes are very well drained before mashing to avoid a soggy base.
    • Spread the potato base evenly for uniform cooking. A thinner layer crisps better.
    • Cook chicken and veggies thoroughly before assembling to save bake time.
    • Use a sharp grater for the cheese to ensure it melts easily.

    Lighter Swaps

    • Replace sour cream with Greek yogurt in the sauce for a lighter option.
    • Use a light cheese or reduced-fat cheese to reduce saturated fat.
    • Swap chicken breast with firm tofu or beans for a vegetarian twist (adjust seasoning accordingly).

    Common Mistakes

    • Adding too much moisture in the potato mash leads to sogginess. Drain potatoes completely.
    • Overcrowding the frying pan when cooking the topping can cause uneven cooking; cook in batches if needed.
    • Not preheating the oven; potato base benefits from a consistent temperature for firm texture.

    Serving Suggestions

    Serve this potato pizza alongside a crisp green salad or steamed seasonal vegetables to balance the meal.

    Storage Instructions

    Keep leftovers in an airtight container in the refrigerator for up to 2 days.

    Reheating Tips

    Reheat slices in a hot oven or toaster oven to maintain a crispy base, about 10 minutes at 175°C (350°F).

    Nutrition Estimate (per serving, serves 4)

    Calories: ~400 kcal
    Protein: ~30 g
    Carbs: ~40 g
    Fat: ~12 g

    Values are estimates and may vary by ingredients and portion size.

    Recipe Summary

    Prep Time: 20 minutes
    Cook Time: 40 minutes
    Total Time: 1 hour
    Servings: 4
    Cuisine: Fusion / Comfort Food
    Course: Main
    Calories: Approximately 400 kcal per serving

    Frequently Asked Questions

    Q: Can I make the potato pizza base ahead of time?
    A: Yes, prepare the base and keep it refrigerated for up to 24 hours, then add toppings and bake when ready.

    Q: Is this recipe gluten-free?
    A: No, it contains wheat flour. Use gluten-free flour substitutes if you need a gluten-free version, though texture may differ.

    Q: Can I use other proteins instead of chicken?
    A: Yes, diced ham, cooked sausage, or a vegetarian protein work well—adjust seasoning and cooking time accordingly.

    This potato pizza offers a fun, hearty alternative to classic pizza with a fresh homemade sauce. It’s easy enough for weeknights yet special enough to enjoy any day. Adding a bit of care in cooking and seasoning guarantees it will quickly become a favorite in your meal rotation. 

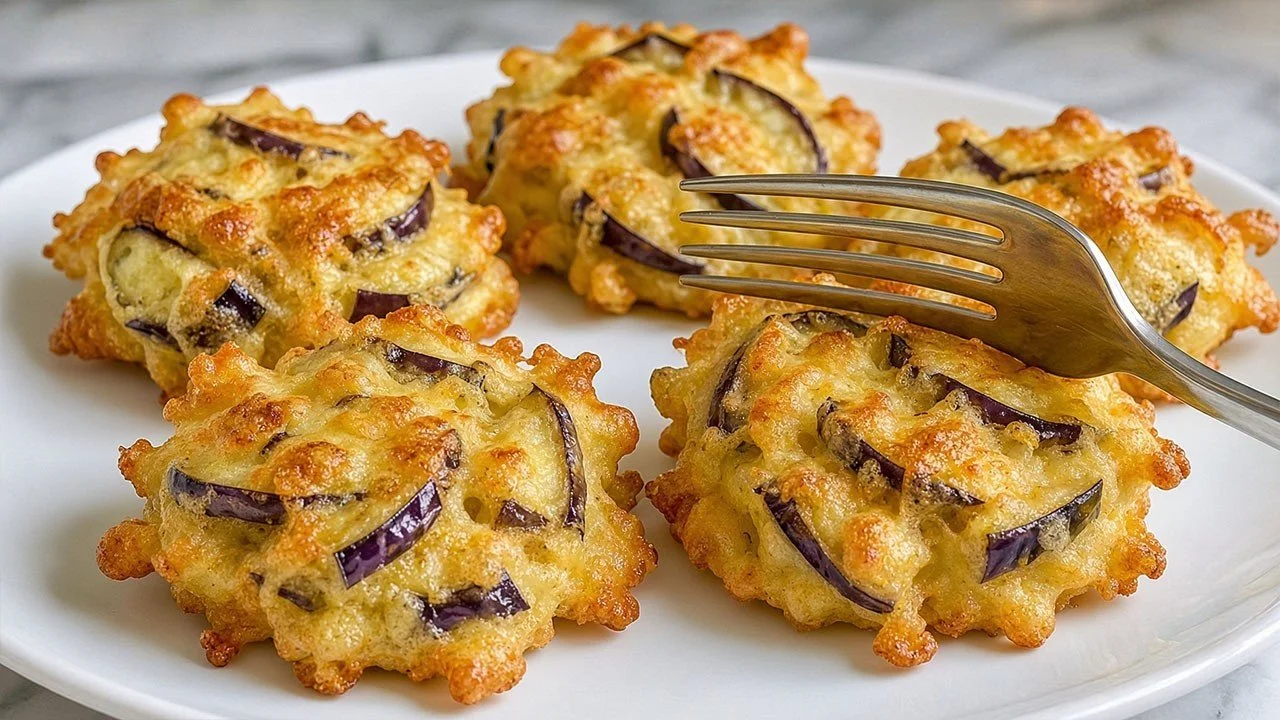
  • The eggplant driving everyone crazy! The best eggplant recipe! Crispy outside and tender inside!

    The eggplant driving everyone crazy! The best eggplant recipe! Crispy outside and tender inside!

    This recipe for a crispy yet tender eggplant snack is perfect for those looking to enjoy a flavorful vegetable dish with a satisfying crunch. The batter, lightened by ice-cold sparkling water and fluffy egg whites, ensures the coating is crisp without being heavy. It’s a great snack or side that appeals to anyone who enjoys fried food balanced with the wholesome goodness of eggplant. Since this recipe involves frying, it’s best enjoyed in moderation, especially for those watching their fat intake. 

    Why This Recipe Is Helpful

    • Transforms a simple eggplant into a crispy, flavorful snack that’s easy to prepare.
    • Uses sparkling water and whipped egg whites in the batter for a light, airy texture.
    • Balances a vegetable’s tenderness with a satisfying crunch, making it appealing for all ages.

    Best For

    This snack is ideal for home cooks who want a quick, impressive side or appetizer that highlights seasonal vegetables. It suits those who enjoy frying but prefer a lighter batter than traditional batters.

    Be Careful If

    This recipe involves deep frying, so it may not be suitable for people limiting fried or high-fat foods. Also, Parmesan cheese adds some dairy, which some diets may restrict.

    Ingredients

    • 1 medium eggplant (about 1 pound / 450 g)
    • ¾ cup (110 g) wheat flour
    • 1 teaspoon (5 g) baking powder
    • ⅓ cup (30 g) grated Parmesan cheese
    • ½ cup (120 ml) ice-cold sparkling mineral water
    • 1 large egg (separated into yolk and whites)
    • Salt, to taste
    • Vegetable oil, for frying (about 2 cups / 500 ml)

    Ingredient Notes

    • Salting the eggplant slices draws out moisture and reduces bitterness.
    • Using sparkling mineral water in the batter helps create a light, crispy coating.
    • Parmesan adds a subtle umami flavor and enhances browning.
    • Whipping the egg whites separately incorporates air to keep the batter airy.

    Kitchen Tools Needed

    • Sharp knife and cutting board
    • Mixing bowls
    • Whisk or electric mixer
    • Frying pan or deep skillet
    • Slotted spoon or tongs
    • Paper towels

    Step-by-Step Instructions

    1. Slice the eggplant into thin rounds, about ¼ inch (0.6 cm) thick.
    2. Sprinkle salt generously over both sides of the slices and let them rest on a rack or paper towels for 20 minutes to pull out bitterness and excess moisture. After resting, pat slices dry.
    3. In a large bowl, combine the wheat flour, baking powder, grated Parmesan, and a pinch of salt. Mix well.
    4. Gradually add the ice-cold sparkling mineral water to the dry ingredients, whisking until you achieve a smooth, batter-like consistency—similar to pancake batter but slightly thicker.
    5. In a separate clean bowl, beat the egg whites until stiff peaks form using a whisk or electric mixer.
    6. Gently fold the beaten egg whites into the batter mixture, taking care to keep the batter fluffy and light.
    7. Heat about 1 inch (2.5 cm) of vegetable oil in a frying pan over medium-high heat until a drop of batter sizzles immediately upon contact.
    8. Dip each eggplant slice into the batter, letting the excess drip back into the bowl, then carefully place the slices into hot oil. Do not overcrowd the pan.
    9. Fry the eggplant slices for about 4–5 minutes, turning occasionally, until golden brown and crispy on both sides.
    10. Remove the cooked slices with a slotted spoon and drain on paper towels to absorb excess oil.
    11. Serve immediately while still crispy and tender inside.

    Pro Tips

    • Cutting eggplant evenly ensures uniform cooking and consistent texture.
    • Don’t skip resting and salting; it makes a noticeable difference in taste and texture.
    • Keep the batter cold by placing the bowl over ice if needed; it helps maintain the crispiness.
    • Use oil with a high smoke point, such as canola or sunflower, for frying.

    Lighter Swaps

    • Baking can be attempted as a lighter method, but the original frying gives the best crispy texture.
    • Substitute Parmesan with nutritional yeast for a dairy-free option, keeping flavor but slightly different texture.
    • Use olive oil sparingly for frying if preferred, but neutral oils work best for crispiness.

    Common Mistakes

    • Not salting the eggplant first can lead to bitter or soggy slices.
    • Overmixing the batter after folding in egg whites deflates it, resulting in a dense coating.
    • Frying oil not hot enough causes greasy, soggy results instead of crispness.

    Serving Suggestions

    Serve these eggplant snacks warm with a simple dip like garlic mayo, marinara sauce, or a yogurt-based dip to complement the crispy coating.

    Storage Instructions

    Best enjoyed fresh, but leftover eggplant snacks can be stored covered in the refrigerator for up to 2 days.

    Reheating Tips

    To reheat, pop them under a preheated broiler or in a hot oven for a few minutes to restore crispiness instead of microwaving.

    Nutrition Estimate (per serving, approx. 4 slices)

    • Calories: 220
    • Protein: 6 g
    • Carbs: 20 g
    • Fat: 12 g

    Values are estimates and may vary by ingredients and portion size.

    Recipe Summary

    Prep Time: 25 minutes (including salting)
    Cook Time: 10 minutes
    Total Time: 35 minutes
    Servings: 4
    Cuisine: Italian-inspired snack
    Course: Appetizer/Snack
    Calories: Approximately 220 per serving

    Frequently Asked Questions

    Can I use gluten-free flour instead of wheat flour?
    Yes, a 1:1 gluten-free flour blend can be substituted, but the texture may change slightly.

    Is it necessary to use sparkling mineral water in the batter?
    Sparkling water adds lightness and crispiness, but plain cold water can be used in a pinch with slightly less airy results.

    Can I make this recipe vegan?
    To make it vegan, substitute the egg with a plant-based binder and use nutritional yeast instead of Parmesan, though the texture will differ from the original.

    This eggplant recipe is a simple way to bring a restaurant-style crispy snack into your kitchen. With minimal ingredients and straightforward steps, it’s a satisfying treat that balances crispy coating with tender vegetable inside. The use of sparkling water and careful batter preparation elevates this beyond typical fried eggplant dishes, making it worth trying for those who love flavorful, crunchy bites with a wholesome touch. 

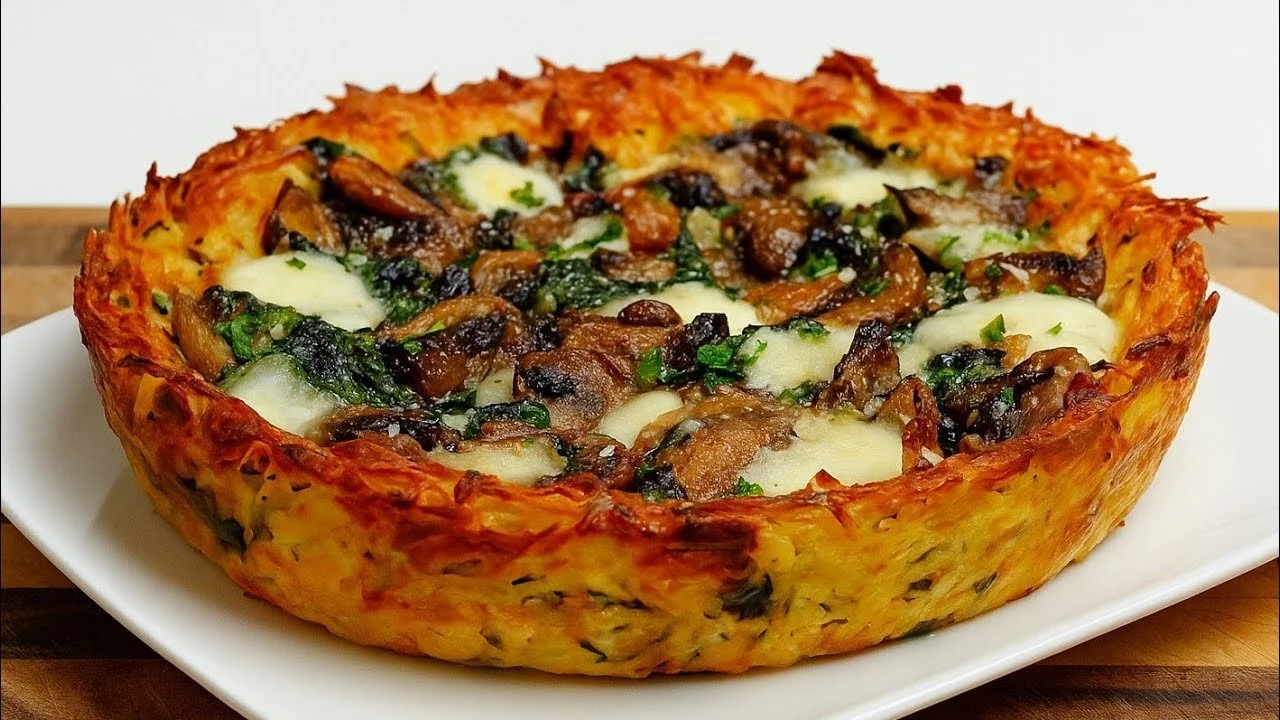
  • Crispy Grated Potato Pie with Spinach and Mushrooms | Easy Savory Pie Recipe

    Crispy Grated Potato Pie with Spinach and Mushrooms | Easy Savory Pie Recipe

    Crispy Grated Potato Pie with Spinach and Mushrooms is a comforting and savory dish that combines crispy baked potato layers with a flavorful filling of sautéed spinach and mushrooms. This recipe is perfect for home cooks looking for an easy, crowd-pleasing meal that feels a bit special but comes together without fuss. It’s a great way to enjoy vegetables alongside cheese and eggs for a filling, balanced meal. Plus, the use of grated potatoes creates a wonderfully crisp texture that contrasts nicely with the creamy mozzarella and tender veggies. For those who appreciate straightforward recipes, this pie offers simplicity without sacrificing taste or presentation, and you can trust it’s made with wholesome ingredients and clear steps that anyone can follow. As a note, this pie does contain dairy and eggs, so it’s best suited for those who tolerate these ingredients well; otherwise, it might be considered an occasional indulgence. 

    Why This Recipe Is Helpful

    • Uses grated potatoes to create a naturally gluten-free crust with a satisfying crunch.
    • Combines simple fresh vegetables with cheese and eggs for a well-rounded, cozy dish.
    • The layering technique ensures everything cooks evenly and looks attractive when served.

    Best For

    This recipe is ideal for families or anyone who enjoys a savory pie with vegetables hidden inside — great for making ahead and serving for lunch or dinner.

    Be Careful If

    This dish contains dairy and eggs, which may not suit vegans or those with dairy or egg allergies. It’s moderately rich, so it’s best enjoyed in balanced portions alongside a fresh salad or lighter sides.

    Ingredients

    • 600 g (1.3 lbs) potatoes, peeled and grated
    • 150 g (5 oz) baby spinach, roughly chopped
    • 200 g (7 oz) champignon mushrooms, finely chopped
    • 1 green onion, finely chopped
    • 1 garlic clove, minced
    • 2 tablespoons olive oil
    • Salt and pepper, to taste
    • 1 teaspoon dried oregano
    • 2 tablespoons fresh parsley, chopped
    • 180 g (6.3 oz) grated mozzarella cheese
    • 120 g (4.2 oz) Fior di Latte mozzarella, sliced
    • Grated Parmesan cheese, for topping (about 1/4 cup / 25 g)
    • 2 large eggs, beaten

    Ingredient Notes

    • Grated potatoes provide a gluten-free, crispy base that bakes well without added flour.
    • Using a mix of mozzarella types adds depth in texture and flavor; Fior di Latte melts smooth, while grated mozzarella blends into the potato mixture.
    • Fresh spinach and mushrooms bring color, moisture, and nutrients.
    • Fresh parsley and oregano offer herby freshness that brightens the pie.

    Kitchen Tools Needed

    • Box grater or food processor for potatoes
    • Large mixing bowl
    • Frying pan
    • Baking dish (around 9×9 inch or similar)
    • Measuring cups and spoons
    • Spatula or wooden spoon

    Step-by-Step Instructions

    1. Peel the potatoes and grate them coarsely using a box grater. Place the grated potatoes into a large bowl of cold water and let rest for 15 minutes to remove excess starch and prevent browning.
    2. Preheat your oven to 200°C (390°F).
    3. While the potatoes soak, finely chop the green onion, baby spinach, and champignon mushrooms. Mince the garlic clove.
    4. Heat 2 tablespoons of olive oil in a frying pan over medium heat. Add the chopped green onion and baby spinach first, seasoning lightly with salt and pepper. Cook for 3-4 minutes until spinach wilts.
    5. Add in the champignon mushrooms, minced garlic, and a sprinkle of oregano. Continue cooking for another 5 minutes or until the mushrooms release their moisture and the mixture becomes fragrant and mostly dry. Remove from heat.
    6. Drain the potatoes well and squeeze out as much water as possible using a clean kitchen towel or your hands—this step is key for getting a crispy pie.
    7. In a large bowl, combine the drained grated potatoes with grated mozzarella, beaten eggs, chopped fresh parsley, and season generously with salt and pepper. Mix everything thoroughly to form a cohesive mixture.
    8. Grease your baking dish with a little olive oil. Spread half of the potato mixture evenly on the bottom to form a firm base layer.
    9. Layer the Fior di Latte mozzarella slices over the potato base, then evenly spread the cooled spinach and mushroom filling on top.
    10. Cover the filling with the remaining potato mixture, smoothing it out gently.
    11. Sprinkle grated Parmesan cheese liberally over the top layer.
    12. Bake in the preheated oven for 35-40 minutes, or until the pie is golden brown and crispy on top.
    13. Remove from the oven and sprinkle the remaining grated mozzarella cheese over the pie. Return to the oven for an additional 10-15 minutes, until the cheese melts and bubbles appealingly.
    14. Let the pie cool for 5 minutes before garnishing with extra parsley and Parmesan cheese. Serve warm and enjoy!

    Pro Tips

    • Make sure to squeeze out water from the grated potatoes thoroughly to prevent a soggy pie.
    • Don’t skip the second cheese layer on top—it adds a beautiful golden crust and gooey finish.
    • Use a baking dish with enough surface area to keep the layers shallow for even baking.
    • If your spinach mixture looks watery, cook it slightly longer to evaporate excess moisture before assembling.

    Lighter Swaps

    • Use part-skim mozzarella cheeses to reduce fat while keeping good melt quality.
    • Swap olive oil for a lighter vegetable oil if you prefer.
    • Skip or reduce Parmesan topping for fewer calories; however, the original cheese blend works best for flavor and texture balance.

    Common Mistakes

    • Not squeezing the potatoes dry enough, which can cause the pie to be soggy inside.
    • Overcrowding the pan when sautéing vegetables, leading to steaming rather than sautéing.
    • Baking the pie at too low temperature, resulting in a pale, soft crust instead of a crispy golden one.

    Serving Suggestions

    Serve slices of this potato pie with a simple green salad or roasted vegetables for a complete meal.

    Storage Instructions

    Cool the pie completely, then cover tightly and store in the refrigerator for up to 3 days.

    Reheating Tips

    Reheat individual slices in a preheated oven or toaster oven at 180°C (350°F) for about 10-15 minutes to restore crispness. Microwave reheating is possible but may soften the crust.

    Nutrition Estimate (per serving; serves 6)

    • Calories: ~320 kcal
    • Protein: 16 g
    • Carbohydrates: 28 g
    • Fat: 15 g

    Values are estimates and may vary by ingredients and portion size.

    Recipe Summary

    • Prep Time: 25 minutes
    • Cook Time: 50 minutes
    • Total Time: 1 hour 15 minutes
    • Servings: 6
    • Cuisine: Mediterranean-inspired
    • Course: Main / Vegetarian
    • Calories: Approximately 320 kcal per serving

    Frequently Asked Questions

    Q: Can I use frozen spinach instead of fresh?
    A: Yes, but make sure to thaw and squeeze out all excess water to avoid a watery filling.

    Q: Is this pie gluten-free?
    A: Yes, made with grated potatoes instead of flour for the crust, making it naturally gluten-free.

    Q: Can I prepare this pie ahead of time?
    A: Absolutely. Assemble the pie, cover, and refrigerate it for up to 24 hours before baking.

    This Crispy Grated Potato Pie with Spinach and Mushrooms is a versatile, tasty option for those who want a savory, satisfying dish that highlights fresh vegetables with a crispy, cheesy finish. It’s well worth making when you want a homely yet elegant meal that can easily become a weeknight favorite. If you want to explore more practical cooking ideas with a clear explanation of recipe guidelines, this is an excellent recipe to try and adapt according to your kitchen basics and taste preferences. 

  • A completely new method! These vanilla cream and coconut rolls disappear in a minute!

    A completely new method! These vanilla cream and coconut rolls disappear in a minute!

    Vanilla cream and coconut rolls are a wonderfully soft and flavorful treat perfect for a cozy morning or an afternoon snack. These rolls bring together a tender yeast dough with a delicate vanilla pudding cream and a dusting of desiccated coconut for a delicious tropical touch. They work well for anyone who enjoys sweet bakery-style rolls at home and appreciate the rich, creamy filling without being overly complicated to prepare. While these rolls have a rich flavor and creamy texture, they’re best savored in moderation due to the sugar and butter content. 

    Why This Recipe Is Helpful

    • Uses fresh yeast and warm milk to create a soft, fluffy dough that rises well.
    • The homemade vanilla cream offers a rich filling without relying on store-bought pudding mixes.
    • Simple ingredients and straightforward steps make this approachable for home cooks of all levels.

    Best For

    This recipe is ideal for home bakers looking for a comforting sweet roll recipe that isn’t overly complex. It’s perfect for family breakfasts, special brunches, or afternoon tea.

    Be Careful If

    These rolls contain butter, sugar, and eggs in both dough and filling, so they are rich treats best enjoyed occasionally. Those managing blood sugar or dairy sensitivities should consider this before indulging.

    Ingredients

    For the dough:

    • 500-550 g (4 cups) wheat flour
    • 2 tablespoons sugar
    • 20 g (1 oz) fresh yeast
    • 250 ml (1 cup) warm milk
    • 70 g (2 1/2 oz) butter, softened
    • 1 large egg
    • 5-6 g (1/2 teaspoon) salt

    For the vanilla cream (pudding cream):

    • 1 large egg
    • 50 g (1/4 cup) sugar
    • 1 teaspoon vanilla sugar
    • 30 g (1/4 cup) cornstarch
    • 240 ml (1 cup) milk
    • 1/2 teaspoon turmeric (for color)
    • 50 g (about 3 1/2 tablespoons) butter

    For decoration:

    • Desiccated coconut

    For brushing:

    • 1 egg mixed with 2 tablespoons milk (for glazing)

    Ingredient Notes

    • Fresh yeast provides the best rise and a lovely soft crumb—dry yeast can be substituted but adjust quantities accordingly.
    • Turmeric is used only for color in the vanilla cream and does not affect flavor.
    • Desiccated coconut adds texture and a natural tropical flavor, but shredded coconut can be used if preferred.
    • Softened butter in dough and cream helps achieve a tender, rich texture.

    Kitchen Tools Needed

    • Large mixing bowl
    • Saucepan
    • Measuring cups and spoons
    • Rolling pin
    • Baking sheet
    • Parchment paper
    • Pastry brush

    Step-by-Step Instructions

    1. In a large bowl, combine the wheat flour, sugar, fresh yeast, warm milk, softened butter, egg, and salt. Stir with a spoon until the dough begins to come together.
    2. Knead the dough on a lightly floured surface or with a stand mixer using a dough hook until smooth and elastic, about 8-10 minutes. Place it back in the bowl, cover with cling film, and let it rise in a warm spot for about 60 minutes until doubled in size.
    3. While the dough rises, prepare the vanilla cream: In a saucepan, whisk together the egg, sugar, vanilla sugar, cornstarch, milk, and turmeric until smooth.
    4. Set the saucepan over medium heat and cook the mixture, stirring constantly, until it thickens and starts to boil. Remove from heat, stir in the butter until melted, cover, and let cool to room temperature.
    5. Preheat your oven to 180°C (356°F) and line a baking tray with parchment paper.
    6. Once the dough has risen, divide it into 9 equal pieces. Shape each piece into a smooth ball and let rest for 10 minutes, covered with a clean towel.
    7. On a floured surface, roll out each dough ball into a flat, oval shape about 6-7 inches (15-18 cm) wide. Spread a spoonful of cooled vanilla cream across the surface, then sprinkle generously with desiccated coconut.
    8. Carefully roll each dough piece into a tight roll and place them seam side down on the prepared baking sheet.
    9. Mix the egg and milk in a small bowl and brush this glaze over the tops of the rolls for a golden finish.
    10. Bake in the preheated oven for 25-30 minutes or until golden brown and cooked through. The rolls should sound hollow when tapped gently.
    11. Remove from the oven and let cool slightly before serving warm.

    Pro Tips

    • Use lukewarm milk (around 100-110°F / 38-43°C) to activate the yeast without killing it.
    • Ensure the vanilla cream is completely cool before spreading to prevent melting the dough.
    • Don’t overfill the rolls to avoid leaks during baking.
    • Allow dough pieces to rest after shaping for easier rolling.

    Lighter Swaps

    • Use low-fat milk instead of whole milk for a slightly lighter vanilla cream.
    • Replace butter in dough with a neutral oil for a different crumb texture, but butter is preferred for flavor.
    • Skip the coconut topping if you want a less sweet option (though it adds nice texture).

    Common Mistakes

    • Using cold milk for the yeast mixture can prevent proper rising.
    • Not kneading long enough may produce dense rolls.
    • Spreading the vanilla cream too thickly when warm can cause dough to tear.

    Serving Suggestions

    Serve these rolls warm with a cup of tea or coffee for a satisfying snack or a simple breakfast. They also pair well with fresh fruit preserves on the side.

    Storage Instructions

    Store leftover rolls in an airtight container at room temperature for up to 2 days or freeze for longer storage.

    Reheating Tips

    Reheat gently in a warm oven (about 150°C / 300°F) for 5-7 minutes or briefly in the microwave to restore softness.

    Nutrition Estimate (per roll)

    • Calories: 320-350 kcal
    • Protein: 6 g
    • Carbs: 40 g
    • Fat: 14 g

    These values are estimates and will vary depending on exact ingredient brands and portion sizes.

    Recipe Summary

    • Prep Time: 20 minutes
    • Cook Time: 30 minutes
    • Total Time: 2 hours (includes rising)
    • Servings: 9 rolls
    • Cuisine: European bakery-inspired
    • Course: Snack/Dessert
    • Calories: Approximately 320-350 per roll

    Frequently Asked Questions

    Q: Can I use dry yeast instead of fresh yeast?
    A: Yes, use about one-third the amount of dry yeast (around 7 g), and activate it in warm milk before mixing with flour.

    Q: Is the turmeric necessary in the cream?
    A: Turmeric is optional and only used to give a pleasant yellow color; it doesn’t impact the taste.

    Q: Can I prepare the dough or cream ahead of time?
    A: Dough can be prepared the day before and refrigerated overnight. Vanilla cream can also be made earlier and refrigerated; bring to room temperature before use.

    Vanilla cream and coconut rolls balance soft, sweet dough with a silky pudding filling—ideal for those who enjoy homemade baked goods with a touch of tropical flair. They are straightforward enough for a home baker to enjoy without fuss, delivering delicious results every time.

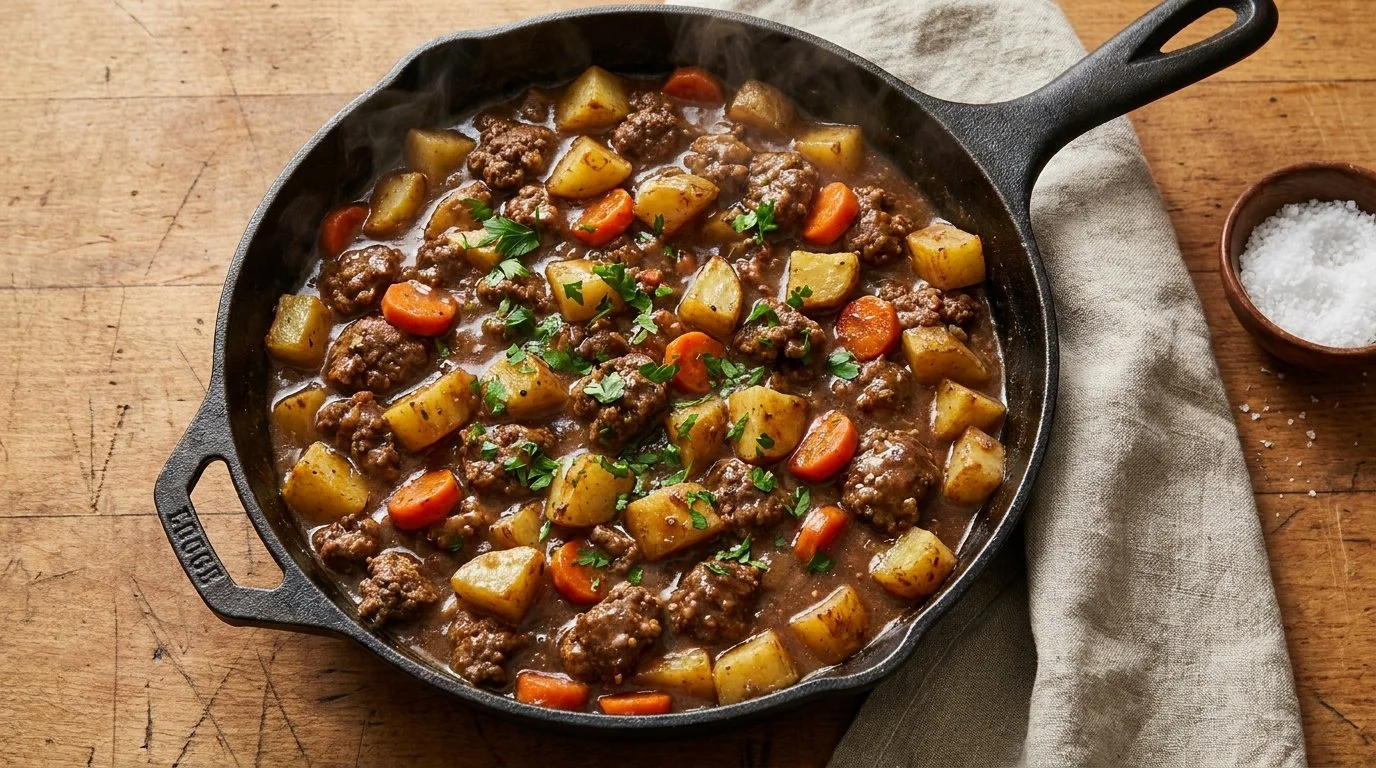
  • When I don’t feel like cooking, my husband makes this! Quick & easy ground beef and potato dinner

    When I don’t feel like cooking, my husband makes this! Quick & easy ground beef and potato dinner

    When you’re not in the mood to spend much time in the kitchen but still want a satisfying, homey meal, this quick ground beef and potato dinner fits the bill perfectly. It’s a comforting one-pot dish packed with tender potatoes, flavorful carrots, and brown beef simmered in a rich broth, making it a hearty dinner that’s simple to prepare and family-friendly. Paired with a refreshing cucumber and avocado salad, it balances protein, veggies, and fats nicely for a well-rounded meal. This recipe is great for busy home cooks looking for a no-fuss dinner that doesn’t compromise on taste or nutrition. Plus, you can trust that the straightforward ingredients keep it wholesome without unnecessary additives or fuss — which aligns well with kitchen practices like respecting kitchen safety and ingredient handling.

    Why This Recipe Is Helpful

    • Requires minimal prep and cooks mostly in one pot, cutting down on cleanup
    • Uses basic pantry and fridge staples, perfect for quick everyday cooking
    • Combines vegetables and protein in a balanced, filling dish

    Best For

    Busy families or cooks who want a dependable, simple meal that pleases a crowd with familiar flavors.

    Be Careful If

    You’re managing sodium intake since beef broth and Worcestershire sauce can add salt. Adjust seasoning accordingly.

    Ingredients

    Main Dish:

    • 1 lb (450 g) ground beef
    • 2 tablespoons (28 g) butter or olive oil
    • 1 medium onion, finely diced
    • 2 cloves garlic, minced
    • 1 tablespoon (15 g) tomato paste
    • 2 medium carrots, sliced
    • 4 medium potatoes, cut into bite-size cubes
    • 1 tablespoon (8 g) all-purpose flour
    • 4 cups (960 ml) beef broth
    • 1 teaspoon Worcestershire sauce (optional)
    • 1 bay leaf
    • 1/2 teaspoon dried thyme or a few fresh thyme sprigs
    • 1/2 teaspoon salt, to taste
    • 1/2 teaspoon black pepper
    • 1-2 tablespoons fresh parsley, chopped for garnish

    Side Salad:

    • 6-7 medium cucumbers, sliced
    • 4 spring onions, finely sliced
    • A handful of fresh cilantro or parsley, chopped
    • 2 small avocados, diced
    • Juice of half a lime
    • Olive oil, for drizzling
    • Crushed red pepper flakes (optional)

    Ingredient Notes

    • Ground beef adds rich protein and flavor; lean or regular works based on preference.
    • Potatoes thicken the stew naturally when lightly mashed; choose waxy or all-purpose potatoes.
    • Tomato paste deepens the savory flavor without overwhelming the dish.
    • The side salad brightens the meal with fresh, creamy avocado and crisp cucumbers.

    Kitchen Tools Needed

    • Large pot with lid
    • Cutting board and knife
    • Measuring cups and spoons
    • Mixing bowl for the salad

    Step-by-Step Instructions

    1. Heat butter or olive oil in a large pot over medium heat. Add ground beef, breaking it up with a spoon, and cook until nicely browned and no longer pink.
    2. Stir in diced onion, cooking until soft and fragrant, about 4-5 minutes. Add garlic and cook for 30 seconds until aromatic, being careful not to burn it.
    3. Mix in tomato paste and cook for 1-2 minutes until it darkens slightly, which enhances its flavor. Sprinkle the flour evenly over the mixture and stir well to combine, helping thicken the broth later.
    4. Add sliced carrots, cubed potatoes, bay leaf, thyme, Worcestershire sauce if using, beef broth, salt, and pepper. Stir everything well to blend flavors.
    5. Increase heat to bring the pot to a gentle boil, then reduce heat to low. Cover loosely and let simmer for 30-35 minutes until potatoes and carrots are tender.
    6. Use a spoon to mash a few potato pieces in the pot gently — this will thicken the broth naturally. Adjust seasoning with more salt and pepper if needed. Remove bay leaf.
    7. Stir in fresh parsley just before serving for a pop of color and freshness.

    For the side salad:

    1. In a bowl, combine sliced cucumbers, spring onions, chopped cilantro or parsley, and diced avocados.
    2. Squeeze lime juice over the mixture, drizzle with olive oil, then toss gently to mix. Add crushed red pepper flakes if you want a little heat. Allow it to rest for about 10 minutes before serving to let flavors meld.

    This recipe also respects good kitchen practices for ingredient freshness and handling, ensuring a tasty and safe meal.

    Pro Tips

    • Browning the beef well adds depth—don’t rush this step.
    • Don’t skip mashing some potatoes; it’s key to thickening the stew without extra ingredients.
    • Let the salad rest; it improves texture and flavor balance.
    • Fresh parsley is best added at the end to preserve its bright flavor and color.

    Lighter Swaps

    • Substitute butter with olive oil for a heart-healthier fat.
    • Use low-sodium beef broth to control salt levels.
    • Skip Worcestershire sauce if avoiding added sugars or gluten.

    Common Mistakes

    • Overcooking the carrots and potatoes until mushy; aim for tender but intact pieces.
    • Burning garlic by adding it too early or cooking it too long.
    • Not mashing enough potatoes to thicken, leaving the broth too thin.

    Serving Suggestions

    Enjoy this stew with a crusty bread or serve over steamed rice for extra comfort. The salad complements the richness with refreshing, creamy bites.

    Storage Instructions

    Store leftovers in an airtight container in the fridge for up to 3 days. Keep salad dressing separate if you want to preserve freshness longer.

    Reheating Tips

    Reheat the stew gently on the stove over low heat, stirring occasionally. Avoid overheating to keep the potatoes intact.

    Nutrition Estimate (per serving, serves 4)

    Calories: 450
    Protein: 30 g
    Carbs: 35 g
    Fat: 18 g

    Values are estimates and may vary depending on exact ingredients and portion sizes.

    Recipe Summary

    Prep Time: 15 minutes
    Cook Time: 40 minutes
    Total Time: 55 minutes
    Servings: 4
    Cuisine: Comfort food, American
    Course: Main course
    Calories: 450 per serving

    Frequently Asked Questions

    Can I use a different protein instead of ground beef?
    Yes, ground turkey or chicken can work, but the flavor and fat content will differ.

    Can I make this recipe vegetarian or vegan?
    This recipe relies on beef broth and ground beef, but you could substitute vegetable broth and plant-based protein, though the taste and texture will change.

    Is the side salad necessary?
    The salad adds freshness and balances the hearty stew but you can skip or replace it with any fresh vegetable side.

    This recipe is a comforting, efficient way to enjoy a balanced, warming dinner with everyday ingredients. The side salad adds a vibrant, healthy contrast that leaves you feeling satisfied without heaviness. Perfect for those nights when a fuss-free, dependable meal makes all the difference.

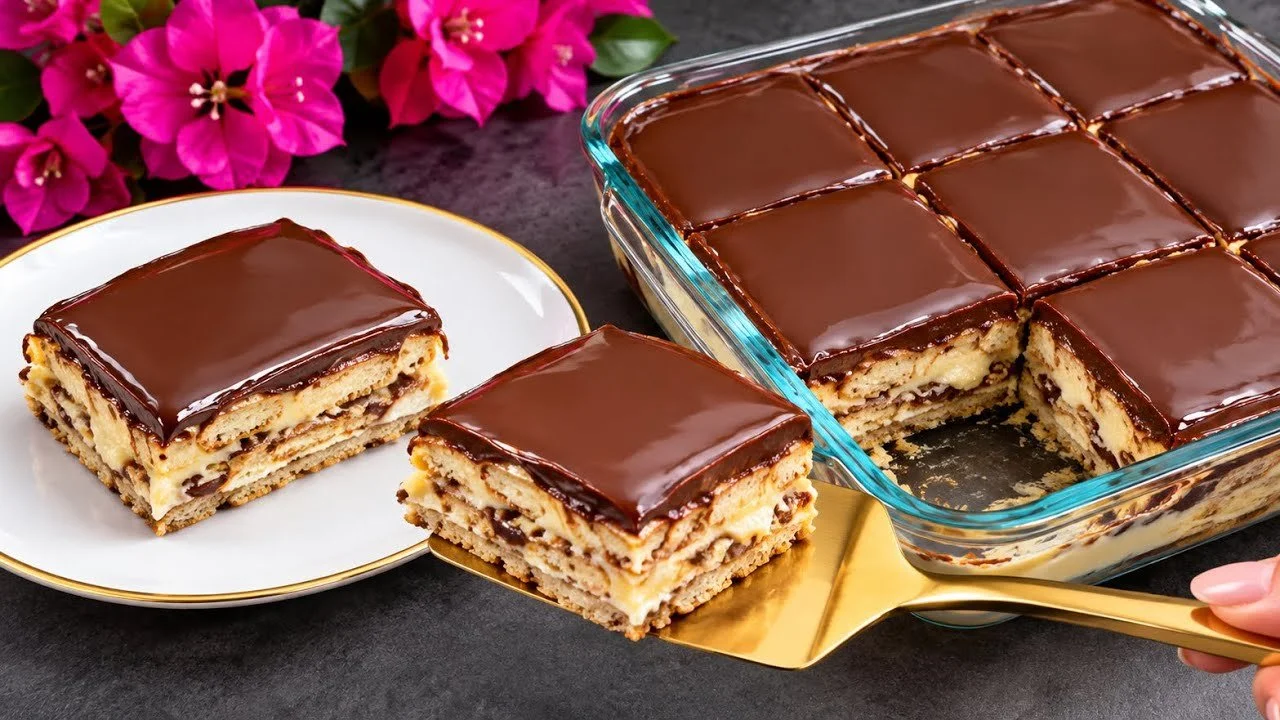
  • The Cloud Cake WITHOUT OVEN! Ready in 10 Minutes Fondant and Ultra Creamy!

    The Cloud Cake WITHOUT OVEN! Ready in 10 Minutes Fondant and Ultra Creamy!

    This Cloud Cake is a delightful no-bake dessert that comes together in just 10 minutes, making it perfect for busy days or last-minute guests. It’s an ultra creamy, fondant-like treat layered over your choice of cookies and topped with a smooth chocolate glaze. If you love creamy puddings and chocolate desserts but don’t want to heat up the oven, this recipe is an easy, impressive option. Bear in mind, it’s a rich and sweet dessert, best enjoyed in moderation. For a complete understanding of how to make this and other cozy recipes, be sure to review the terms and conditions for recipe use.

    Why This Recipe Is Helpful

    • Ready in just 10 minutes, it saves time without compromising taste.
    • No oven needed, great for hot days or when you don’t want extra heat in the kitchen.
    • Uses simple, common ingredients that you can keep stocked easily.

    Best For

    This dessert works well for anyone wanting a quick, comforting treat without fuss. It’s ideal for family gatherings or anytime you crave something creamy and chocolatey.

    Be Careful If

    This recipe contains dairy and sugar, so it may not suit those with lactose intolerance or individuals managing sugar intake closely.

    Ingredients

    • 2 tablespoons (16 g) cornstarch
    • 2 tablespoons (20 g) vanilla pudding powder
    • 3 cups (750 ml) milk, divided
    • 80 g (about 1/3 cup) sugar
    • 1 tablespoon (15 ml) liquid vanilla extract
    • 1 1/4 cups (300 ml) heavy whipping cream
    • Cookies of your choice to line the mold (approx. 30-40 cookies depending on size)
    • 100 g (3.5 oz) chocolate (semi-sweet or dark recommended)
    • 100 ml (about 7 tablespoons) milk (for chocolate glaze)
    • 1 tablespoon (20 g) butter

    Ingredient Notes

    • Vanilla pudding powder helps set the cream layer without baking — you can substitute with instant pudding mix if needed.
    • Whipping cream folded into the pudding mixture creates that light, cloud-like texture.
    • Choose your favorite cookies: plain biscuits, graham crackers, or chocolate wafers all work well.
    • Using good-quality chocolate makes a big difference in the glaze’s flavor and smoothness.

    Kitchen Tools Needed

    • Saucepan
    • Whisk and mixing bowls
    • Electric mixer or hand whisk for whipping cream
    • 21 x 21 cm (8 x 8 inch) square mold or baking dish
    • Microwave-safe bowl

    Step-by-Step Instructions

    1. In a medium saucepan, combine cornstarch, vanilla pudding powder, sugar, and 600 ml (2 1/2 cups) of milk. Whisk until smooth.
    2. Heat the mixture over medium heat, stirring constantly until it thickens to a pudding consistency (about 5-7 minutes). Remove from heat and stir in the vanilla extract. Let it cool completely at room temperature.
    3. While the pudding cools, whip the heavy cream until stiff peaks form – it should hold its shape when you lift the whisk.
    4. Gently fold the whipped cream into the cooled pudding, mixing carefully to keep it light and airy.
    5. Line the base and sides of your mold with your chosen cookies, arranging them snugly.
    6. Pour the creamy pudding mixture evenly over the cookies, spreading gently with a spatula if needed.
    7. In a microwave-safe bowl, combine the chocolate, 100 ml (7 tablespoons) milk, and butter. Microwave in 20-second intervals, stirring each time until fully melted and smooth.
    8. Pour the chocolate glaze over the cream layer and smooth it gently.
    9. Refrigerate for at least 2 hours, allowing the dessert to set and flavors to meld. For best results, chill up to 4 hours before serving.

    Pro Tips

    • Make sure the pudding is completely cool before folding in the whipped cream to prevent it from melting.
    • Use a gentle folding technique to keep the texture light and fluffy.
    • When melting chocolate in the microwave, stirring frequently ensures it doesn’t burn.
    • Choose cookies that won’t become too soggy quickly; sturdier biscuits help maintain structure.

    Lighter Swaps

    • Use low-fat milk instead of whole milk, but keep heavy cream for folding to retain creaminess.
    • Substitute sugar with a natural sweetener suitable for cooking if desired, though flavor may alter slightly.
    • For a lighter chocolate topping, use a thin drizzle of melted chocolate instead of full glaze.

    Common Mistakes

    • Adding whipped cream to warm pudding, which can cause it to deflate.
    • Overmixing when folding whipped cream, resulting in a less airy texture.
    • Using too soft or fresh cookies that dissolve quickly and make the cake soggy.

    Serving Suggestions

    Serve chilled with fresh berries or a sprinkle of toasted nuts for added texture and freshness. This dessert pairs nicely with a simple cup of coffee or tea.

    Storage Instructions

    Keep the cake covered and refrigerated. It will stay fresh for up to 3 days but tastes best within 24 hours.

    Reheating Tips

    This dessert is best served cold and is not suitable for reheating.

    Nutrition Estimate (per serving, serves 8)

    • Calories: 320 kcal
    • Protein: 5 g
    • Carbohydrates: 35 g
    • Fat: 18 g

    Values are estimates and may vary by ingredients and portion size.

    Recipe Summary

    • Prep Time: 10 minutes
    • Cook Time: 7 minutes
    • Total Time: 2 hours 17 minutes (including chilling)
    • Servings: 8
    • Cuisine: Dessert
    • Course: Sweet treat
    • Calories: 320 per serving

    Frequently Asked Questions

    Can I make this cake ahead of time?
    Yes, it’s perfect to prepare a few hours in advance; chilling helps the layers set properly.

    Can I use different flavors of pudding powder?
    You can experiment, but vanilla is recommended for the best complement to the chocolate topping.

    Is this cake suitable for lactose-intolerant people?
    This recipe contains dairy-heavy ingredients, so it’s not suitable without substituting lactose-free alternatives.

    This Cloud Cake strikes a lovely balance between indulgence and speed, perfectly suited for those moments when you want a luscious dessert without baking. Its soft, creamy layers and chocolate finish make it a crowd-pleaser that’s surprisingly simple to prepare.