Category: Cakes & Desserts

  • Grandma’s famous 8-spoon plum cake in 5 minutes! No scales needed!

    Grandma’s famous 8-spoon plum cake in 5 minutes! No scales needed!

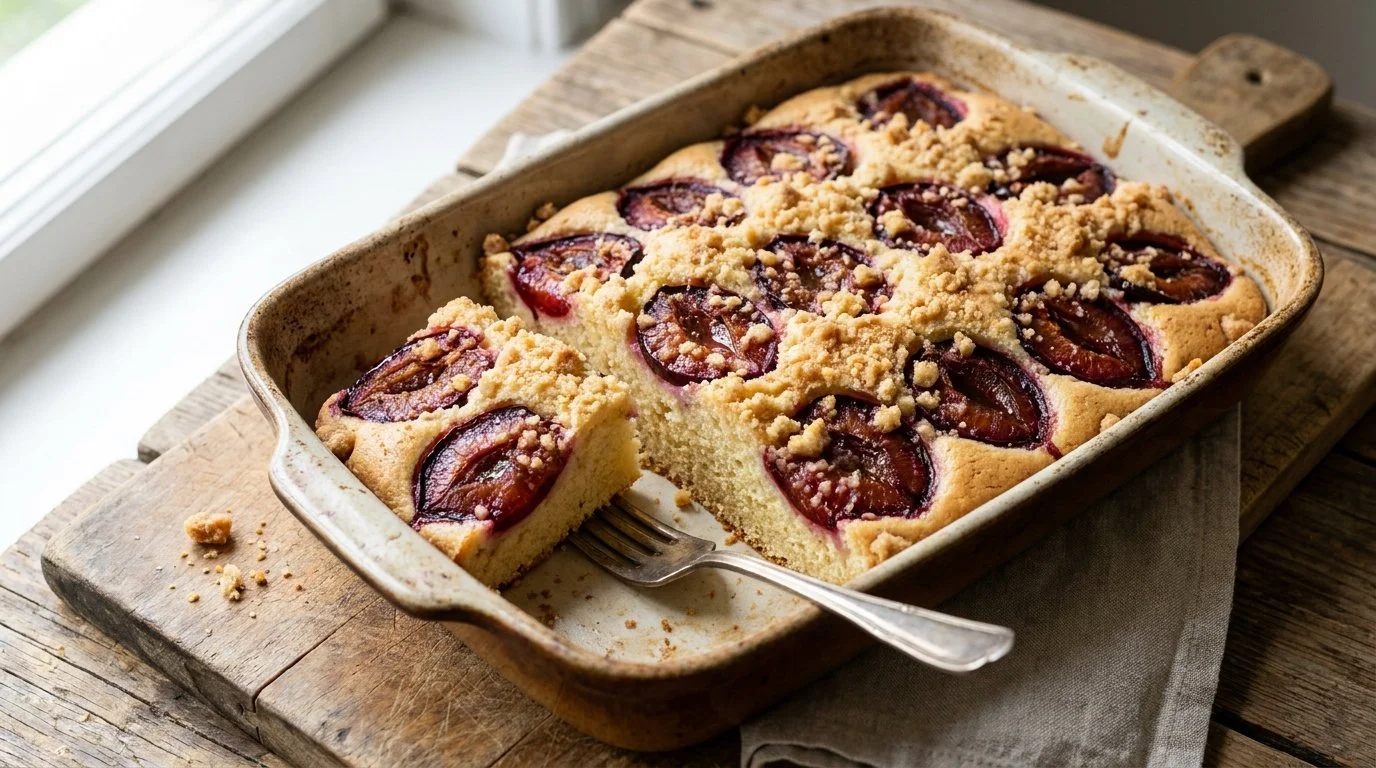
    This simple plum cake recipe brings a nostalgic touch to your kitchen with a fuss-free method that requires no scales—just an easy spoon-measure approach. Using fresh plums enveloped in a tender lemony batter topped with a buttery crumble, this cake is ideal for those who want a straightforward dessert with a homemade feel. It’s perfect for anyone who appreciates fruity cakes that aren’t overly sweet and want a quick way to create a delicious treat. Since it’s made with basic pantry ingredients and fresh fruit, it makes for a pleasant, balanced occasional sweet that can be enjoyed with family or guests. 

    Why This Recipe Is Helpful

    • Measures ingredients easily using tablespoons, making it accessible for any home cook without a scale.
    • Combines fresh fruit with a moist, lemon-infused batter that is quick to prepare yet satisfying.
    • The crumble topping adds texture and a touch of buttery sweetness, enhancing the overall flavor.

    Best For

    This cake is great for home bakers of any skill level looking for a spring or summer dessert. It’s also a wonderful option for casual gatherings or afternoon tea when fresh seasonal plums are available.

    Be Careful If

    This recipe contains a moderate amount of sugar and oil, so it’s best enjoyed in moderation, especially for those monitoring sugar intake.

    Ingredients

    • 2 large eggs
    • 8 tablespoons (100 g) granulated sugar
    • 1 teaspoon vanilla sugar or 1 teaspoon vanilla extract
    • A pinch of salt
    • 8 tablespoons (120 ml) vegetable oil
    • 8 tablespoons (120 ml) milk
    • Zest of 1 lemon
    • 8 tablespoons (120 ml) lemon juice (freshly squeezed)
    • 8 tablespoons (60 g) all-purpose flour
    • 1 teaspoon baking powder
    • 400 grams (about 14 oz) fresh plums
    • 1 tablespoon cornflour (cornstarch)

    For the Crumble Topping:

    • 3 tablespoons (22 g) all-purpose flour
    • 2 tablespoons (25 g) granulated sugar
    • 1 tablespoon (15 g) cold unsalted butter

    Ingredient Notes

    • Using fresh, ripe plums gives the cake the perfect balance of tartness and sweetness; choose firm but juicy fruit.
    • Cornflour helps prevent the plums from sinking and keeps the batter from becoming soggy.
    • Lemon zest and juice brighten the flavor profile, balancing the sweetness and adding natural freshness.
    • Vanilla sugar can be substituted with vanilla extract if preferred; just use one teaspoon.

    Kitchen Tools Needed

    • Mixing bowl
    • Electric whisk or hand whisk
    • Measuring spoons (tablespoon and teaspoon)
    • 18 x 26 cm (7 x 10 inch) baking pan
    • Knife and chopping board
    • Spoon or spatula
    • Oven

    Step-by-Step Instructions

    1. Preheat your oven to 180°C (350°F). Lightly grease your baking pan with butter or oil.
    2. In a mixing bowl, whisk the eggs and sugar together briskly until frothy and lighter in color. This ensures a light texture.
    3. Add the vanilla sugar (or extract), a pinch of salt, vegetable oil, milk, lemon zest, and lemon juice. Stir until everything is well combined.
    4. Gradually sift in the flour and baking powder, folding carefully until you get a smooth, lump-free batter.
    5. Pit half of the plums and dice them into small pieces. Toss these diced plums in the cornflour, then fold them gently into the batter to distribute evenly.
    6. In a separate small bowl, prepare the crumble topping by rubbing together the flour, sugar, and cold butter until the mixture resembles coarse breadcrumbs.
    7. Pour the batter into your greased baking pan and smooth the surface gently with a spatula.
    8. Slice the remaining plums and arrange the slices evenly on top of the batter.
    9. Sprinkle the crumble topping evenly over the fruit layer.
    10. Bake in the preheated oven for about 40 minutes, or until the top is golden brown and a toothpick inserted into the center comes out clean. If the crumble browns too quickly, cover loosely with foil after 30 minutes.
    11. Allow the cake to cool completely in the pan before slicing, so it sets nicely and slices cleanly. Serve warm or at room temperature.

    Pro Tips

    • Make sure the plums are coated well in cornflour to keep the batter from becoming watery.
    • Use fresh lemon juice for the best bright citrus flavor — bottled lemon juice won’t deliver the same freshness.
    • Don’t overmix the batter once flour is added to keep the cake tender and light.
    • If you don’t have vanilla sugar, a good quality vanilla extract works perfectly.

    Lighter Swaps

    • Substitute the vegetable oil with a light olive oil or melted coconut oil for a different flavor profile.
    • Use almond milk or oat milk instead of dairy milk for a dairy-free option.
    • For less sugar in the crumble topping, reduce sugar to 1 tablespoon; the plums add natural sweetness.

    Common Mistakes

    • Not properly coating the diced plums with cornflour; this can cause the batter to turn soggy.
    • Overbaking, which results in a dry cake—check starting at 35 minutes.
    • Using very soft or overripe plums can lead to excess moisture and affect cake texture.

    Serving Suggestions

    Serve slices with a dollop of whipped cream, yogurt, or vanilla ice cream for a more indulgent dessert option.

    Storage Instructions

    Store the cake in an airtight container at room temperature for up to 2 days, or refrigerate for up to 5 days.

    Reheating Tips

    Warm slices gently in a microwave for 15–20 seconds or in a low oven before serving to refresh the texture.

    Nutrition Estimate (per serving, based on 8 servings)

    • Calories: 290–320 kcal
    • Protein: 4 g
    • Carbohydrates: 40 g
    • Fat: 12 g

    Values are estimates and may vary by ingredients and portion size.

    Recipe Summary

    Prep Time: 10 minutes
    Cook Time: 40 minutes
    Total Time: 50 minutes
    Servings: 8
    Cuisine: European homestyle
    Course: Dessert
    Calories: Approximately 300 kcal per serving

    Frequently Asked Questions

    Q: Can I use frozen plums for this recipe?
    A: You can, but thaw and drain them well before adding, and toss in extra cornflour to prevent excess moisture.

    Q: Is this cake suitable for gluten-free diets?
    A: Not as is, but you can substitute the flour with a gluten-free blend and check the baking powder for gluten content.

    Q: Can I make the crumble topping ahead of time?
    A: Yes, you can prepare the crumble topping a day in advance and keep it chilled until ready to use.

    This plum cake is a delightful mix of simplicity and flavor that makes it a valuable recipe to have on hand. Its easy method means you can get a fresh homemade cake on the table with minimal fuss, perfect for those moments when a quick, comforting dessert is needed.

  • Oatmeal, yogurt, and apple! A healthy cake without flour and sugar!

    Oatmeal, yogurt, and apple! A healthy cake without flour and sugar!

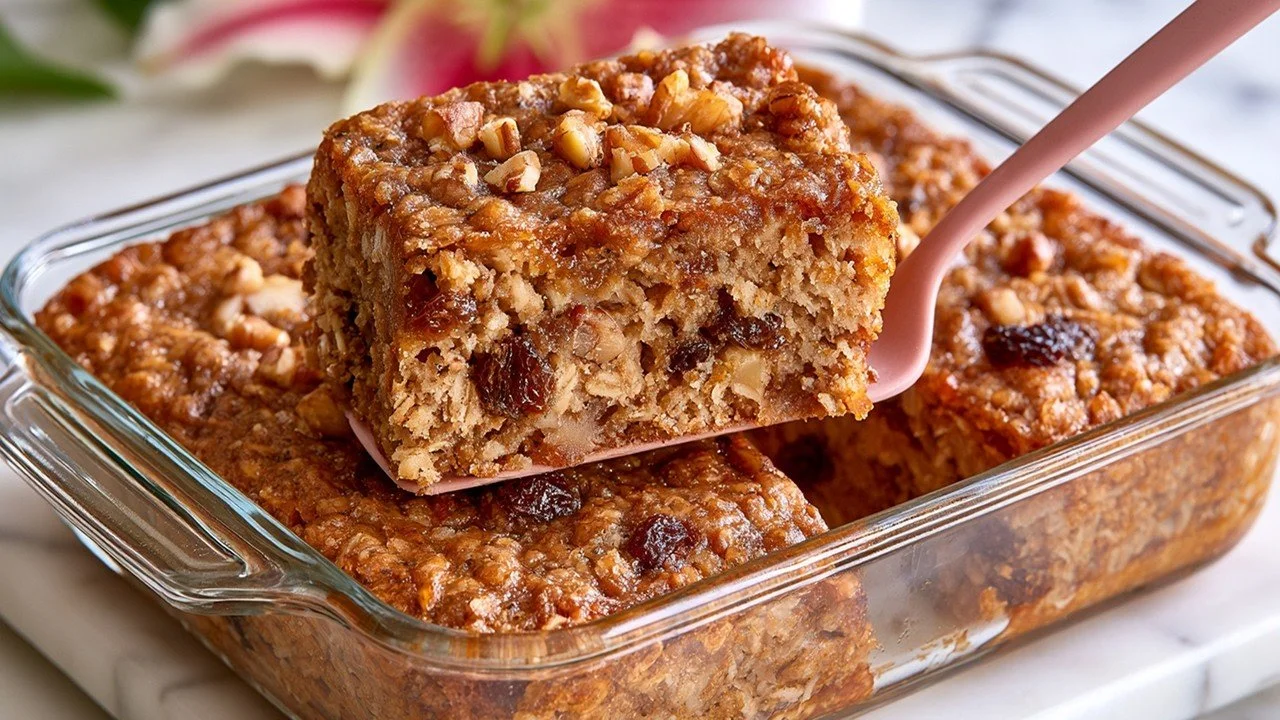
    This oatmeal, yogurt, and apple cake is a simple and wholesome treat that doesn’t rely on flour or refined sugar. It’s naturally sweetened with honey and fruit, making it an appealing option for anyone looking for a healthier dessert or snack that still feels indulgent. With the goodness of whole oats, fresh apples, nuts, and berries, this cake is filling and balanced, suitable for busy home cooks who want quick, nourishing homemade baking. Since it includes nuts and dairy, it’s important to keep those dietary factors in mind when serving.

    Why This Recipe Is Helpful

    • Uses simple, natural ingredients for a whole-food approach to baking.
    • Flourless and refined sugar-free, making it suitable for light and quick baking.
    • Combines fruit and nuts for extra fiber and healthy fats to keep you full longer.

    Best For

    People who want a convenient, lightly sweetened cake without processed flour or sugar. A good choice for a family snack or breakfast treat.

    Be Careful If

    You need to avoid nuts or dairy, as this recipe contains both nuts and yogurt. It also has natural fruit sugars, so moderation is key.

    Ingredients

    • 1 cup (90 g) oatmeal
    • 2 tablespoons (30 g) yogurt (plain or Greek)
    • 1 large egg
    • 1 medium apple, chopped (about 150 g)
    • 1/3 cup (40 g) mixed nuts, roughly chopped
    • 1 tablespoon (12 g) baking powder
    • 1/4 cup (40 g) blueberries or raisins
    • 1 tablespoon (21 g) honey

    Ingredient Notes

    • Oatmeal: Using rolled oats works best for texture; instant oats may make it too mushy.
    • Yogurt: Adds moisture and slight tanginess; plain or Greek options both work.
    • Apple: Provides natural sweetness and moisture—no need for added sugar.
    • Nuts: Enhance texture and nutrition; walnuts or almonds are great choices.

    Kitchen Tools Needed

    • Mixing bowl
    • Spoon or spatula
    • 8-inch (20 cm) square or round baking pan
    • Oven
    • Measuring cups and spoons

    Step-by-Step Instructions

    1. Preheat your oven to 180°C (350°F). Lightly grease your baking pan to prevent sticking.
    2. In a large mixing bowl, combine the oatmeal, baking powder, chopped nuts, and blueberries or raisins. Stir well to distribute everything evenly.
    3. Add the yogurt, egg, chopped apple, and honey into the dry ingredients. Mix thoroughly until you have a uniform batter. The mixture will be thick but moist.
    4. Pour the batter into the prepared baking pan, smoothing the top with a spatula.
    5. Bake for about 40 minutes, or until the cake is golden brown and a toothpick inserted in the center comes out clean.
    6. Remove from the oven and allow the cake to cool completely in the pan before slicing.
    7. Serve plain or with extra yogurt or fresh fruit on the side for added taste and texture.

    Pro Tips

    • Chop nuts finely if serving to children or to make the cake easier to slice.
    • Letting the batter sit for 5 minutes before baking helps the oats absorb moisture for a softer bite.
    • Check the cake around 35 minutes to avoid overbaking, which can dry it out.
    • Use fresh or frozen blueberries; just thaw if frozen before mixing in.

    Lighter Swaps

    The original version works best for moisture and flavor balance, but you can reduce honey slightly if you prefer less sweetness.

    Common Mistakes

    • Overmixing the batter can create a dense cake; mix until just combined.
    • Not greasing the pan can cause sticking — be sure to prepare your pan well.
    • Using very wet or pureed fruits instead of chopped apple may change the texture too much.

    Serving Suggestions

    Enjoy this cake as a light breakfast, a nutritious snack, or alongside a cup of tea or coffee.

    Storage Instructions

    Store leftovers in an airtight container at room temperature for up to 2 days, or in the fridge for up to 5 days.

    Reheating Tips

    Warm slices gently in a microwave or oven for a cozy, fresh-from-the-oven feel.

    Nutrition Estimate (per serving, recipe makes about 6 servings)

    Calories: Approximately 150-180
    Protein: Around 5 g
    Carbs: About 25 g
    Fat: Roughly 6 g
    Values are estimates and may vary by ingredients and portion size.

    Recipe Summary

    Prep Time: 10 minutes
    Cook Time: 40 minutes
    Total Time: 50 minutes
    Servings: 6
    Cuisine: Healthy/Bakery
    Course: Snack or Breakfast
    Calories: Approximately 150-180 per serving

    Frequently Asked Questions

    Q: Can I use gluten-free oats in this recipe?
    A: Yes, gluten-free oats work perfectly, making this recipe suitable for gluten-sensitive individuals.

    Q: Is it possible to make this recipe vegan?
    A: You can substitute the egg with a flax egg and use dairy-free yogurt and honey alternatives, but texture may differ slightly.

    Q: Can I freeze this cake?
    A: Yes, it freezes well. Wrap slices tightly after cooling and thaw at room temperature before serving.

    This cake is a wonderful balance of convenience, health, and taste, making it an excellent choice when you want a home-baked treat that’s both satisfying and nourishing.

  • A completely new method! These vanilla cream and coconut rolls disappear in a minute!

    A completely new method! These vanilla cream and coconut rolls disappear in a minute!

    Vanilla cream and coconut rolls are a wonderfully soft and flavorful treat perfect for a cozy morning or an afternoon snack. These rolls bring together a tender yeast dough with a delicate vanilla pudding cream and a dusting of desiccated coconut for a delicious tropical touch. They work well for anyone who enjoys sweet bakery-style rolls at home and appreciate the rich, creamy filling without being overly complicated to prepare. While these rolls have a rich flavor and creamy texture, they’re best savored in moderation due to the sugar and butter content. 

    Why This Recipe Is Helpful

    • Uses fresh yeast and warm milk to create a soft, fluffy dough that rises well.
    • The homemade vanilla cream offers a rich filling without relying on store-bought pudding mixes.
    • Simple ingredients and straightforward steps make this approachable for home cooks of all levels.

    Best For

    This recipe is ideal for home bakers looking for a comforting sweet roll recipe that isn’t overly complex. It’s perfect for family breakfasts, special brunches, or afternoon tea.

    Be Careful If

    These rolls contain butter, sugar, and eggs in both dough and filling, so they are rich treats best enjoyed occasionally. Those managing blood sugar or dairy sensitivities should consider this before indulging.

    Ingredients

    For the dough:

    • 500-550 g (4 cups) wheat flour
    • 2 tablespoons sugar
    • 20 g (1 oz) fresh yeast
    • 250 ml (1 cup) warm milk
    • 70 g (2 1/2 oz) butter, softened
    • 1 large egg
    • 5-6 g (1/2 teaspoon) salt

    For the vanilla cream (pudding cream):

    • 1 large egg
    • 50 g (1/4 cup) sugar
    • 1 teaspoon vanilla sugar
    • 30 g (1/4 cup) cornstarch
    • 240 ml (1 cup) milk
    • 1/2 teaspoon turmeric (for color)
    • 50 g (about 3 1/2 tablespoons) butter

    For decoration:

    • Desiccated coconut

    For brushing:

    • 1 egg mixed with 2 tablespoons milk (for glazing)

    Ingredient Notes

    • Fresh yeast provides the best rise and a lovely soft crumb—dry yeast can be substituted but adjust quantities accordingly.
    • Turmeric is used only for color in the vanilla cream and does not affect flavor.
    • Desiccated coconut adds texture and a natural tropical flavor, but shredded coconut can be used if preferred.
    • Softened butter in dough and cream helps achieve a tender, rich texture.

    Kitchen Tools Needed

    • Large mixing bowl
    • Saucepan
    • Measuring cups and spoons
    • Rolling pin
    • Baking sheet
    • Parchment paper
    • Pastry brush

    Step-by-Step Instructions

    1. In a large bowl, combine the wheat flour, sugar, fresh yeast, warm milk, softened butter, egg, and salt. Stir with a spoon until the dough begins to come together.
    2. Knead the dough on a lightly floured surface or with a stand mixer using a dough hook until smooth and elastic, about 8-10 minutes. Place it back in the bowl, cover with cling film, and let it rise in a warm spot for about 60 minutes until doubled in size.
    3. While the dough rises, prepare the vanilla cream: In a saucepan, whisk together the egg, sugar, vanilla sugar, cornstarch, milk, and turmeric until smooth.
    4. Set the saucepan over medium heat and cook the mixture, stirring constantly, until it thickens and starts to boil. Remove from heat, stir in the butter until melted, cover, and let cool to room temperature.
    5. Preheat your oven to 180°C (356°F) and line a baking tray with parchment paper.
    6. Once the dough has risen, divide it into 9 equal pieces. Shape each piece into a smooth ball and let rest for 10 minutes, covered with a clean towel.
    7. On a floured surface, roll out each dough ball into a flat, oval shape about 6-7 inches (15-18 cm) wide. Spread a spoonful of cooled vanilla cream across the surface, then sprinkle generously with desiccated coconut.
    8. Carefully roll each dough piece into a tight roll and place them seam side down on the prepared baking sheet.
    9. Mix the egg and milk in a small bowl and brush this glaze over the tops of the rolls for a golden finish.
    10. Bake in the preheated oven for 25-30 minutes or until golden brown and cooked through. The rolls should sound hollow when tapped gently.
    11. Remove from the oven and let cool slightly before serving warm.

    Pro Tips

    • Use lukewarm milk (around 100-110°F / 38-43°C) to activate the yeast without killing it.
    • Ensure the vanilla cream is completely cool before spreading to prevent melting the dough.
    • Don’t overfill the rolls to avoid leaks during baking.
    • Allow dough pieces to rest after shaping for easier rolling.

    Lighter Swaps

    • Use low-fat milk instead of whole milk for a slightly lighter vanilla cream.
    • Replace butter in dough with a neutral oil for a different crumb texture, but butter is preferred for flavor.
    • Skip the coconut topping if you want a less sweet option (though it adds nice texture).

    Common Mistakes

    • Using cold milk for the yeast mixture can prevent proper rising.
    • Not kneading long enough may produce dense rolls.
    • Spreading the vanilla cream too thickly when warm can cause dough to tear.

    Serving Suggestions

    Serve these rolls warm with a cup of tea or coffee for a satisfying snack or a simple breakfast. They also pair well with fresh fruit preserves on the side.

    Storage Instructions

    Store leftover rolls in an airtight container at room temperature for up to 2 days or freeze for longer storage.

    Reheating Tips

    Reheat gently in a warm oven (about 150°C / 300°F) for 5-7 minutes or briefly in the microwave to restore softness.

    Nutrition Estimate (per roll)

    • Calories: 320-350 kcal
    • Protein: 6 g
    • Carbs: 40 g
    • Fat: 14 g

    These values are estimates and will vary depending on exact ingredient brands and portion sizes.

    Recipe Summary

    • Prep Time: 20 minutes
    • Cook Time: 30 minutes
    • Total Time: 2 hours (includes rising)
    • Servings: 9 rolls
    • Cuisine: European bakery-inspired
    • Course: Snack/Dessert
    • Calories: Approximately 320-350 per roll

    Frequently Asked Questions

    Q: Can I use dry yeast instead of fresh yeast?
    A: Yes, use about one-third the amount of dry yeast (around 7 g), and activate it in warm milk before mixing with flour.

    Q: Is the turmeric necessary in the cream?
    A: Turmeric is optional and only used to give a pleasant yellow color; it doesn’t impact the taste.

    Q: Can I prepare the dough or cream ahead of time?
    A: Dough can be prepared the day before and refrigerated overnight. Vanilla cream can also be made earlier and refrigerated; bring to room temperature before use.

    Vanilla cream and coconut rolls balance soft, sweet dough with a silky pudding filling—ideal for those who enjoy homemade baked goods with a touch of tropical flair. They are straightforward enough for a home baker to enjoy without fuss, delivering delicious results every time.

  • The Cloud Cake WITHOUT OVEN! Ready in 10 Minutes Fondant and Ultra Creamy!

    The Cloud Cake WITHOUT OVEN! Ready in 10 Minutes Fondant and Ultra Creamy!

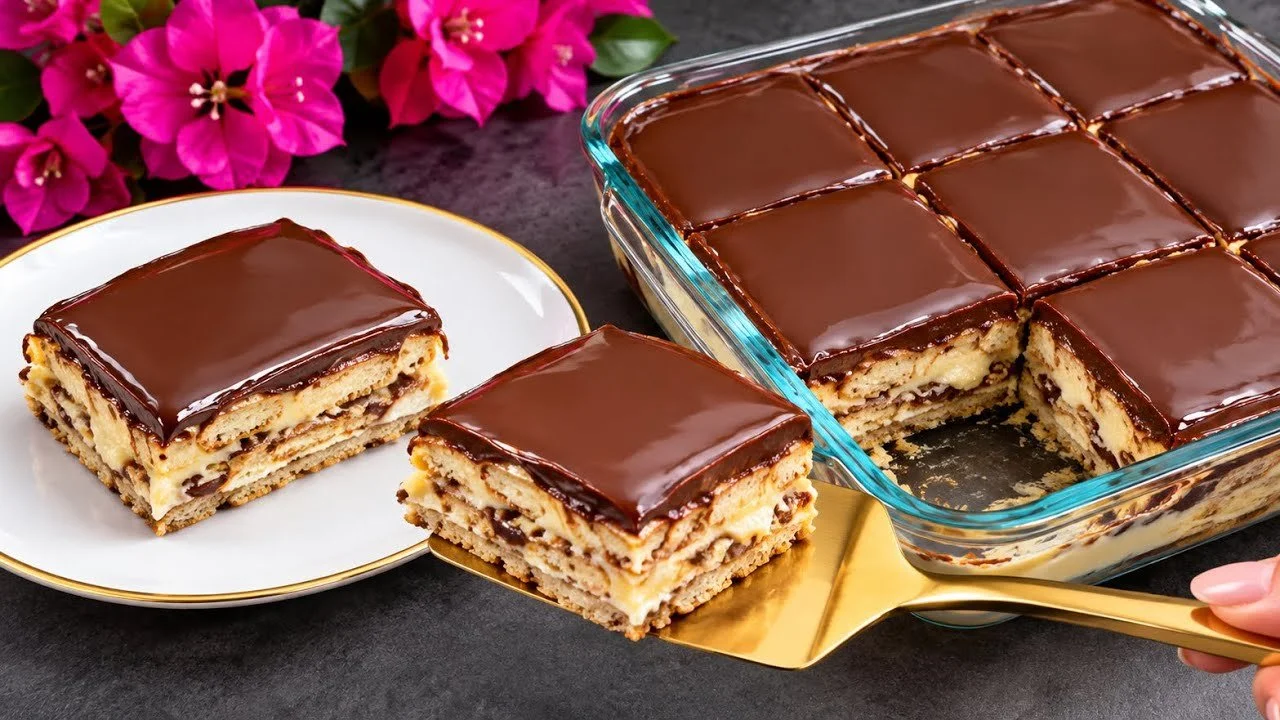
    This Cloud Cake is a delightful no-bake dessert that comes together in just 10 minutes, making it perfect for busy days or last-minute guests. It’s an ultra creamy, fondant-like treat layered over your choice of cookies and topped with a smooth chocolate glaze. If you love creamy puddings and chocolate desserts but don’t want to heat up the oven, this recipe is an easy, impressive option. Bear in mind, it’s a rich and sweet dessert, best enjoyed in moderation. For a complete understanding of how to make this and other cozy recipes, be sure to review the terms and conditions for recipe use.

    Why This Recipe Is Helpful

    • Ready in just 10 minutes, it saves time without compromising taste.
    • No oven needed, great for hot days or when you don’t want extra heat in the kitchen.
    • Uses simple, common ingredients that you can keep stocked easily.

    Best For

    This dessert works well for anyone wanting a quick, comforting treat without fuss. It’s ideal for family gatherings or anytime you crave something creamy and chocolatey.

    Be Careful If

    This recipe contains dairy and sugar, so it may not suit those with lactose intolerance or individuals managing sugar intake closely.

    Ingredients

    • 2 tablespoons (16 g) cornstarch
    • 2 tablespoons (20 g) vanilla pudding powder
    • 3 cups (750 ml) milk, divided
    • 80 g (about 1/3 cup) sugar
    • 1 tablespoon (15 ml) liquid vanilla extract
    • 1 1/4 cups (300 ml) heavy whipping cream
    • Cookies of your choice to line the mold (approx. 30-40 cookies depending on size)
    • 100 g (3.5 oz) chocolate (semi-sweet or dark recommended)
    • 100 ml (about 7 tablespoons) milk (for chocolate glaze)
    • 1 tablespoon (20 g) butter

    Ingredient Notes

    • Vanilla pudding powder helps set the cream layer without baking — you can substitute with instant pudding mix if needed.
    • Whipping cream folded into the pudding mixture creates that light, cloud-like texture.
    • Choose your favorite cookies: plain biscuits, graham crackers, or chocolate wafers all work well.
    • Using good-quality chocolate makes a big difference in the glaze’s flavor and smoothness.

    Kitchen Tools Needed

    • Saucepan
    • Whisk and mixing bowls
    • Electric mixer or hand whisk for whipping cream
    • 21 x 21 cm (8 x 8 inch) square mold or baking dish
    • Microwave-safe bowl

    Step-by-Step Instructions

    1. In a medium saucepan, combine cornstarch, vanilla pudding powder, sugar, and 600 ml (2 1/2 cups) of milk. Whisk until smooth.
    2. Heat the mixture over medium heat, stirring constantly until it thickens to a pudding consistency (about 5-7 minutes). Remove from heat and stir in the vanilla extract. Let it cool completely at room temperature.
    3. While the pudding cools, whip the heavy cream until stiff peaks form – it should hold its shape when you lift the whisk.
    4. Gently fold the whipped cream into the cooled pudding, mixing carefully to keep it light and airy.
    5. Line the base and sides of your mold with your chosen cookies, arranging them snugly.
    6. Pour the creamy pudding mixture evenly over the cookies, spreading gently with a spatula if needed.
    7. In a microwave-safe bowl, combine the chocolate, 100 ml (7 tablespoons) milk, and butter. Microwave in 20-second intervals, stirring each time until fully melted and smooth.
    8. Pour the chocolate glaze over the cream layer and smooth it gently.
    9. Refrigerate for at least 2 hours, allowing the dessert to set and flavors to meld. For best results, chill up to 4 hours before serving.

    Pro Tips

    • Make sure the pudding is completely cool before folding in the whipped cream to prevent it from melting.
    • Use a gentle folding technique to keep the texture light and fluffy.
    • When melting chocolate in the microwave, stirring frequently ensures it doesn’t burn.
    • Choose cookies that won’t become too soggy quickly; sturdier biscuits help maintain structure.

    Lighter Swaps

    • Use low-fat milk instead of whole milk, but keep heavy cream for folding to retain creaminess.
    • Substitute sugar with a natural sweetener suitable for cooking if desired, though flavor may alter slightly.
    • For a lighter chocolate topping, use a thin drizzle of melted chocolate instead of full glaze.

    Common Mistakes

    • Adding whipped cream to warm pudding, which can cause it to deflate.
    • Overmixing when folding whipped cream, resulting in a less airy texture.
    • Using too soft or fresh cookies that dissolve quickly and make the cake soggy.

    Serving Suggestions

    Serve chilled with fresh berries or a sprinkle of toasted nuts for added texture and freshness. This dessert pairs nicely with a simple cup of coffee or tea.

    Storage Instructions

    Keep the cake covered and refrigerated. It will stay fresh for up to 3 days but tastes best within 24 hours.

    Reheating Tips

    This dessert is best served cold and is not suitable for reheating.

    Nutrition Estimate (per serving, serves 8)

    • Calories: 320 kcal
    • Protein: 5 g
    • Carbohydrates: 35 g
    • Fat: 18 g

    Values are estimates and may vary by ingredients and portion size.

    Recipe Summary

    • Prep Time: 10 minutes
    • Cook Time: 7 minutes
    • Total Time: 2 hours 17 minutes (including chilling)
    • Servings: 8
    • Cuisine: Dessert
    • Course: Sweet treat
    • Calories: 320 per serving

    Frequently Asked Questions

    Can I make this cake ahead of time?
    Yes, it’s perfect to prepare a few hours in advance; chilling helps the layers set properly.

    Can I use different flavors of pudding powder?
    You can experiment, but vanilla is recommended for the best complement to the chocolate topping.

    Is this cake suitable for lactose-intolerant people?
    This recipe contains dairy-heavy ingredients, so it’s not suitable without substituting lactose-free alternatives.

    This Cloud Cake strikes a lovely balance between indulgence and speed, perfectly suited for those moments when you want a luscious dessert without baking. Its soft, creamy layers and chocolate finish make it a crowd-pleaser that’s surprisingly simple to prepare.